

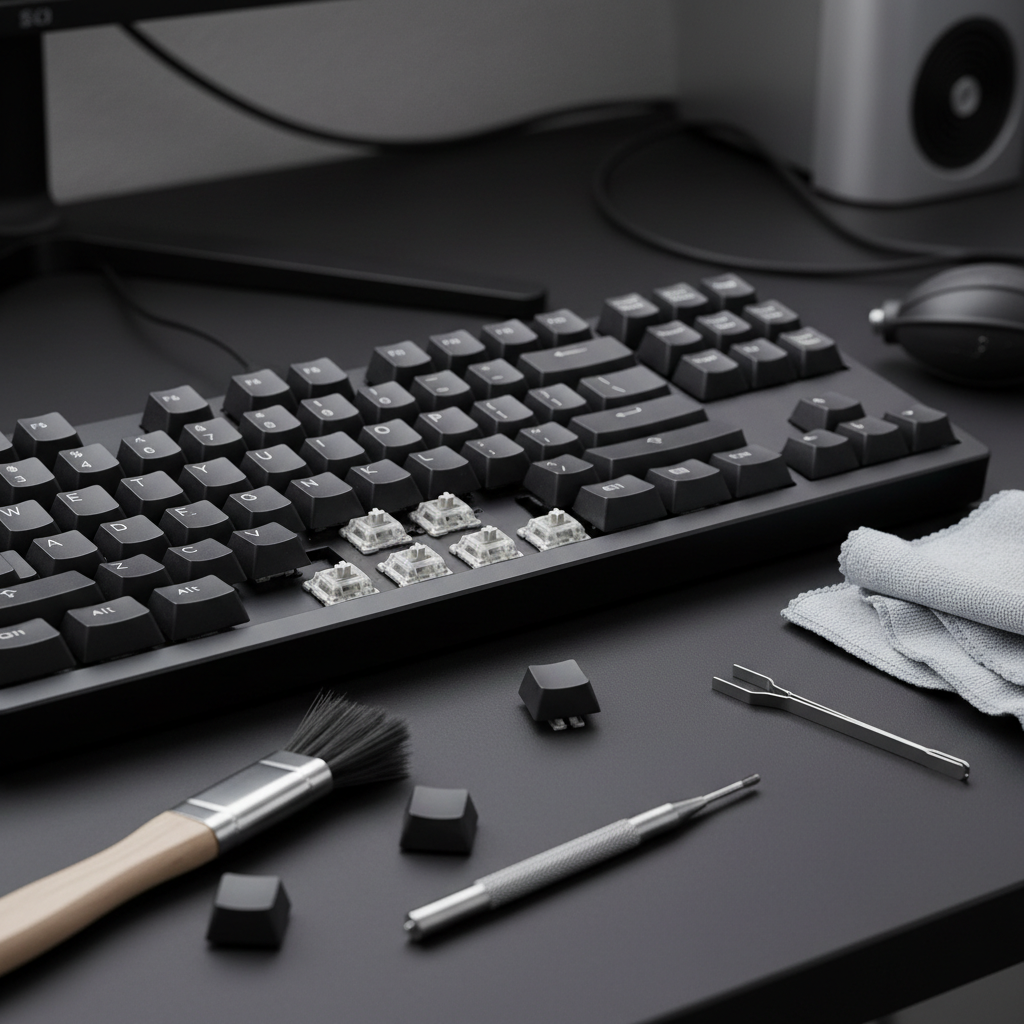
Your mechanical keyboard collects dust, crumbs, and oils every day. Over time, this buildup affects how your keys feel and work. A good mechanical keyboard cleaning routine keeps your keyboard looking new and typing smoothly. This guide shows you how to clean mechanical keyboard at three different levels, from a quick five-minute wipe-down to a full deep clean. Whether you are new to keyboards or a long-time user, you will find the right method for your needs.
Quick Overview – What You’ll Learn in This Mechanical Keyboard Cleaning Guide
Before we start, let us look at what this mechanical keyboard cleaning guide covers. You will learn three cleaning methods that match different needs and schedules. Each level takes a different amount of time and uses different tools.
Three Cleaning Levels Explained
Level 1 is a quick surface clean. You wipe the outside of your keyboard without removing any parts. Level 2 is a medium clean where you pull off the keycaps and wash them. Level 3 is a deep clean that sanitizes every part of your keyboard. Each level of mechanical keyboard cleaning builds on the last one.
Estimated Time for Each Level
| Cleaning Level | Time Needed | Best For |
|---|---|---|
| Level 1 – Quick Clean | 5 minutes | Weekly maintenance |
| Level 2 – Medium Clean | 15 minutes | Monthly care |
| Level 3 – Deep Clean | 30+ minutes | Every 3-6 months |
When to Use Each Cleaning Method
Use Level 1 when your keyboard looks dusty or you eat near it often. Choose Level 2 when keys feel sticky or look dirty underneath. Pick Level 3 when you spill something, notice bad smells, or haven’t cleaned your keyboard in months. This mechanical keyboard cleaning guide helps you decide which level fits your situation.
Essential Tools and Supplies for Mechanical Keyboard Cleaning
Having the right tools makes mechanical keyboard cleaning easier and safer. You do not need expensive equipment. Most items are cheap and easy to find at local stores or online.
Basic Cleaning Kit for Quick Maintenance
For Level 1 cleaning, gather these simple items:
- Microfiber cloth (lint-free)
- Compressed air can or electric air duster
- Soft-bristle brush or clean makeup brush
- Isopropyl alcohol (70% or higher)
- Cotton swabs
Deep Cleaning Supplies and Equipment
For Level 2 and Level 3 mechanical keyboard cleaning, you will also need:
- Keycap puller (wire style preferred)
- Switch puller (for hot-swap keyboards)
- Mild dish soap
- A small bowl or container
- Warm water
- A clean towel for drying
- A camera or phone for photos
Recommended Cleaning Products and Brands
Here are trusted products for your keyboard cleaning kit:
- Compressed Air: Falcon Dust-Off or Metrovac DataVac
- Keycap Puller: NPKING wire puller or Glorious keycap tool
- Isopropyl Alcohol: Any 70%+ solution from a pharmacy
- Microfiber Cloth: Amazon Basics or any lint-free brand
- Brush: Clean paintbrush or dedicated keyboard brush
Tools to Avoid When Cleaning Your Keyboard
Some tools can damage your keyboard during mechanical keyboard cleaning. Never use these items:
- Metal knives or flathead screwdrivers to pry keycaps (they scratch and break clips)
- Bleach or ammonia-based cleaners (they damage plastic and legends)
- Paper towels (they leave lint and can scratch surfaces)
- Vacuum cleaners with strong suction (they can pull out switches)
- Hair dryers on hot settings (heat warps keycaps and damages PCBs)
Level 1 – Quick Clean Your Mechanical Keyboard (5 Minutes)
This is the fastest way to clean mechanical keyboard. You can do this level every week to keep your keyboard fresh. No parts come off during this process.
Step 1 – Unplug and Power Off Your Keyboard
Always start by disconnecting your keyboard. Unplug the USB cable from your computer. If your keyboard has a power switch, turn it off. For wireless keyboards, this step prevents accidental key presses that could pair with other devices. This safety step is important in every mechanical keyboard cleaning session.
Step 2 – Remove Surface Debris and Dust
Turn your keyboard upside down over a trash can or towel. Gently shake it to dislodge loose crumbs and hair. Then flip it back and use short bursts of compressed air between the rows of keys. Hold the can upright and spray at an angle. Move from one side to the other. A soft brush helps loosen stubborn particles between keys before you use air again.
Step 3 – Wipe Down Keycaps and Case
Dampen a microfiber cloth with a small amount of isopropyl alcohol. Do not soak the cloth. Wipe each keycap gently, starting from the top row and working down. Flip the cloth to a clean side as it picks up grime. Wipe the keyboard case and the area around the keys. This removes finger oils and surface germs during your mechanical keyboard cleaning.
Step 4 – Final Touches and Testing
Let the keyboard air dry for one minute. Plug it back in and test a few keys. Make sure every key registers properly. Your quick mechanical keyboard cleaning is now complete. This simple routine keeps your keyboard hygienic between deeper cleanings.
Level 2 – Medium Clean Your Mechanical Keyboard (15 Minutes)
This level of mechanical keyboard cleaning removes keycaps to reach dirt trapped underneath. You will wash the keycaps separately and clean the exposed keyboard plate.
Step 1 – Prepare Your Workspace and Tools
Clear a flat table and lay down a clean towel. Place all your tools within reach. Take a photo of your keyboard layout with your phone. This helps you remember where each key goes when you reassemble. Good preparation makes mechanical keyboard cleaning smoother and faster.
Step 2 – Remove Keycaps Safely with a Keycap Puller
Use a wire-style keycap puller. Slide the wire ends under opposite sides of a keycap. Pull straight up with steady pressure. Start with the larger keys like Enter and Shift. Work in rows from top to bottom. Place removed keycaps in a bowl. Never use metal tools to pry keycaps, as this breaks the stems and scratches the keyboard during cleaning.
Step 3 – Clean Keycaps Using Soap and Water
Fill a bowl with warm water and a few drops of mild dish soap. Submerge all keycaps in the soapy water. Let them soak for 10 to 15 minutes. Use your fingers or a soft brush to gently rub each keycap. Rinse them under clean running water. Lay them face-down on a towel to dry. This is a key part of thorough mechanical keyboard cleaning.
Step 4 – Clean the Keyboard Plate and Switches
With keycaps removed, use compressed air to blow out debris between the switches. Dip cotton swabs in isopropyl alcohol and clean around each switch stem. Wipe the keyboard plate with a damp microfiber cloth. Pay attention to corners where dust collects. This step reveals how much grime hides under your keys.
Step 5 – Dry Everything Completely
Make sure every keycap is fully dry before reassembly. Check the holes on the bottom of each cap. Any moisture left can damage the switches. Let keycaps air dry for at least 30 minutes. Use a dry cloth to wipe the keyboard plate. Patience here prevents damage during mechanical keyboard cleaning.
Step 6 – Reassemble and Test All Keys
Refer to your layout photo. Press each keycap firmly onto its switch stem until you feel it click into place. Start with the bottom row and work upward. Once all keys are on, plug in the keyboard. Open a text document and type every key to confirm they all work. Your medium-level mechanical keyboard cleaning is complete.
Level 3 – Deep Clean Your Mechanical Keyboard (30+ Minutes)
This is the most thorough mechanical keyboard cleaning method. It sanitizes every surface and removes years of buildup. Plan extra time because keycaps must dry fully before reassembly.
Step 1 – Document Your Keyboard Layout with Photos
Take clear photos of your full keyboard from above. Focus on tricky layouts like the bottom row, where keys like Ctrl, Alt, and Space sit. Some keyboards have non-standard key sizes. Photos save you frustration during reassembly. This documentation step is essential for proper mechanical keyboard cleaning.
Step 2 – Remove All Keycaps Systematically
Follow the same keycap removal method from Level 2. Work in sections and place keycaps in groups on your towel. Keep modifier keys (Shift, Ctrl, Alt) separate since they have different sizes. Take your time and be gentle. Rushing this step can bend stabilizer wires.
Step 3 – Soak Keycaps for Deep Sanitization
Use warm water with dish soap for a longer soak of 30 to 60 minutes. For white keycaps with yellowing, add a teaspoon of denture cleaning tablet to the water. This helps lift stains. After soaking, scrub each keycap with a soft toothbrush. Rinse thoroughly with clean water. This deep soak is the heart of Level 3 mechanical keyboard cleaning.
Step 4 – Use Compressed Air on Switches and Plate
Hold the keyboard at an angle and blow compressed air through every gap between switches. Work in a grid pattern from left to right, top to bottom. Tilt the keyboard in different directions to reach all angles. You will be surprised by how much dust comes out during this mechanical keyboard cleaning step.
Step 5 – Clean Between Switches with Cotton Swabs and Alcohol
Dip cotton swabs in isopropyl alcohol. Run them between every row of switches. Clean the sides of each switch housing. Wipe the stabilizer wires for larger keys. Replace swabs as they get dirty. This detailed work separates a deep clean from a basic one.
Step 6 – Address Stubborn Grime and Stains
For sticky residue, press a damp alcohol swab on the spot for 30 seconds before wiping. For dried food particles, use a wooden toothpick gently to lift them. Never use metal tools near switches. For the keyboard case, a slightly damp cloth with mild soap works well. Rinse and dry immediately.
Step 7 – Allow Proper Drying Time (24 Hours Recommended)
Spread keycaps on a dry towel in a single layer. Place them in a well-ventilated area away from direct sunlight. Wait at least 24 hours for full drying. Check the inside of larger keycaps like Enter and Space for trapped water. Rushing this step risks water damage to your switches, which ruins the whole mechanical keyboard cleaning effort.
Step 8 – Reassemble Keys and Perform Full Function Test
Use your photos to guide reassembly. Press each keycap straight down until it seats firmly. Test every single key by typing. Check stabilizer keys (Space, Enter, Shift) for smooth operation. If a key feels scratchy, remove it and check for debris. Your complete mechanical keyboard cleaning is now finished.
Special Considerations for Different Keyboard Types
Not all keyboards are the same. These tips help you adjust your mechanical keyboard cleaning approach for specific designs.
Cleaning Hot-Swappable Mechanical Keyboards
Hot-swap keyboards let you pull out switches without soldering. During deep cleaning, you can remove switches for even better access. Use a switch puller tool. Pull switches straight up. Clean the PCB surface underneath. Let everything dry before pushing switches back in. Always push switches in straight to avoid bending pins.
Cleaning Wireless and Bluetooth Keyboards
Remove batteries before cleaning wireless keyboards. For keyboards with built-in rechargeable batteries, make sure the keyboard is fully powered off. Avoid getting moisture near charging ports. After cleaning, let the keyboard dry longer than usual since water near electronics is risky. This extra care protects your investment during mechanical keyboard cleaning.
Cleaning Keyboards with Different Switch Types (Linear, Tactile, Clicky)
All switch types can handle the same cleaning methods. However, clicky switches may collect more debris in their click mechanism. Use extra compressed air bursts on clicky switches. Linear switches have simpler internals and clean easily. Tactile switches fall in between. No switch type requires special cleaning products.
Cleaning Keyboards with RGB Lighting
RGB LEDs sit under translucent keycaps. Clean these keycaps gently to avoid scratching the clear plastic. Use only soft cloths and mild cleaners. Alcohol is safe for most RGB keycaps but test a small area first. The lighting itself does not need cleaning, but dust on the LEDs reduces brightness. Compressed air works well here.
How Often Should You Clean Your Mechanical Keyboard?
The right cleaning schedule depends on your environment and habits. Here is a general guide for mechanical keyboard cleaning frequency.
Daily and Weekly Quick Maintenance Tips
Wipe your keyboard with a dry microfiber cloth daily. This removes fresh oils and dust. Once a week, do a Level 1 quick clean with compressed air and a damp wipe. If you eat at your desk, clean more often. Hand sanitizer residue on your fingers transfers to keys quickly.
Monthly Deep Cleaning Schedule
Perform Level 2 mechanical keyboard cleaning once a month. This keeps keycaps shiny and prevents grime buildup. Set a reminder on your phone if needed. Monthly cleaning takes 15 minutes and extends your keyboard’s life significantly.
Signs Your Keyboard Needs Immediate Cleaning
Watch for these warning signs that your keyboard needs urgent mechanical keyboard cleaning:
- Keys feel sticky or slow to return
- Visible crumbs or debris between keys
- Unpleasant smell from the keyboard
- Keys make unusual sounds when pressed
- A liquid was recently spilled on the keyboard
Troubleshooting Common Issues After Cleaning Your Mechanical Keyboard
Sometimes problems appear after mechanical keyboard cleaning. Here is how to fix the most common issues.
Keys Not Working After Reassembly
If a key does not register, the keycap may not be fully seated. Press down firmly on the key. For hot-swap keyboards, check that the switch pins are not bent. Remove the switch and look at the pins from the side. Gently bend them straight if needed and reinsert.
Sticky or Unresponsive Keys
A sticky key usually means liquid got inside the switch. If this happened during cleaning, remove the keycap and press the switch stem many times while applying compressed air. Let it dry for 24 hours. For hot-swap boards, replace the affected switch. Sticky keys after mechanical keyboard cleaning usually resolve with more drying time.
Moisture Damage Recovery Steps
If water entered your keyboard, unplug it immediately. Turn it upside down to drain. Do not press any keys. Let it dry for at least 48 hours in a warm, dry area. Use silica gel packets nearby to absorb moisture. After drying, test the keyboard. If keys still malfunction, the PCB may need professional repair.
When to Seek Professional Help
Contact the manufacturer or a repair shop if multiple keys fail after cleaning, if you see burn marks on the PCB, or if liquid damage caused a short circuit. Professional repair costs less than replacing an entire keyboard. Some manufacturers offer cleaning and repair services.
Pro Tips for Maintaining a Clean Mechanical Keyboard
Good habits between mechanical keyboard cleaning sessions keep your keyboard in top shape longer.
Using Keyboard Covers and Cases
A silicone keyboard cover protects against spills and dust when you are not typing. For transport, use a padded keyboard sleeve or case. Covers reduce how often you need to deep clean. However, remove covers during typing since they affect the feel and can trap heat.
Eating and Drinking Habits to Protect Your Keyboard
Keep food and drinks away from your keyboard. If you must eat nearby, use a keyboard cover. Wash your hands before typing to reduce oil transfer. These simple habits dramatically reduce the need for frequent mechanical keyboard cleaning.
Storage Tips for Long-Term Keyboard Care
Store your keyboard in a dust-free environment. If you have multiple keyboards, keep unused ones in their original boxes or sealed bags. Avoid storing keyboards in humid areas like basements. Extreme temperatures can warp keycaps and damage switches over time.
Preventive Maintenance Best Practices
Make mechanical keyboard cleaning part of your routine. Set weekly and monthly reminders. Keep a small cleaning kit near your desk. The less time between cleanings, the easier each session becomes. A well-maintained keyboard lasts many years and always feels great to type on.
FAQ – Common Questions About Mechanical Keyboard Cleaning
Can I Use a Dishwasher to Clean Keycaps?
Some people put ABS or PBT keycaps in the dishwasher on a gentle cycle. However, this is risky. High heat can warp keycaps, and harsh detergents may fade the legends. Hand washing with mild soap is the safer choice for mechanical keyboard cleaning. If you try the dishwasher, use the top rack, cold water, and no heated dry cycle.
Is It Safe to Use Water on My Mechanical Keyboard?
Never pour water directly on your keyboard. The PCB and switches are not waterproof. Water on keycaps during soaking is fine as long as you dry them completely before reassembly. For the keyboard body, use only a damp cloth, never a wet one. This rule prevents costly damage during mechanical keyboard cleaning.
How Do I Remove Yellowing from White Keycaps?
White keycaps yellow over time due to UV exposure and oils. Soak them in a mixture of warm water and a denture cleaning tablet for several hours. For severe yellowing, apply a cream of peroxide (hydrogen peroxide mixed with thickener) and place the keycaps under UV light for a few hours. This process, called “retrobrighting,” restores white color. Always test on one keycap first.
Can Cleaning Void My Keyboard Warranty?
Normal mechanical keyboard cleaning with recommended tools does not void warranties. However, damage from using wrong tools, excessive water, or disassembling switches may void coverage. Check your manufacturer’s warranty terms. Most warranties cover manufacturing defects, not cleaning damage. When in doubt, contact the manufacturer before deep cleaning.
What’s the Best Way to Clean a Keyboard Without Removing Keycaps?
Use compressed air between rows, followed by a soft brush to loosen debris. Wipe the surface with a slightly damp microfiber cloth. Cotton swabs dipped in alcohol can reach between keys. This method works for quick maintenance but cannot match a full keycap-removal clean. It is a good option for office keyboards where you cannot remove keycaps.
Conclusion – Keep Your Mechanical Keyboard Clean and Performing at Its Best
Regular mechanical keyboard cleaning protects your investment and keeps your typing experience smooth. Start with Level 1 quick cleans each week. Move to Level 2 monthly for deeper care. Save Level 3 for seasonal deep cleans or when your keyboard shows heavy buildup. With the right tools and techniques from this guide, you can clean any mechanical keyboard safely and effectively. A clean keyboard looks better, feels better, and lasts longer. Pick up your compressed air and microfiber cloth today, and give your keyboard the care it deserves.