

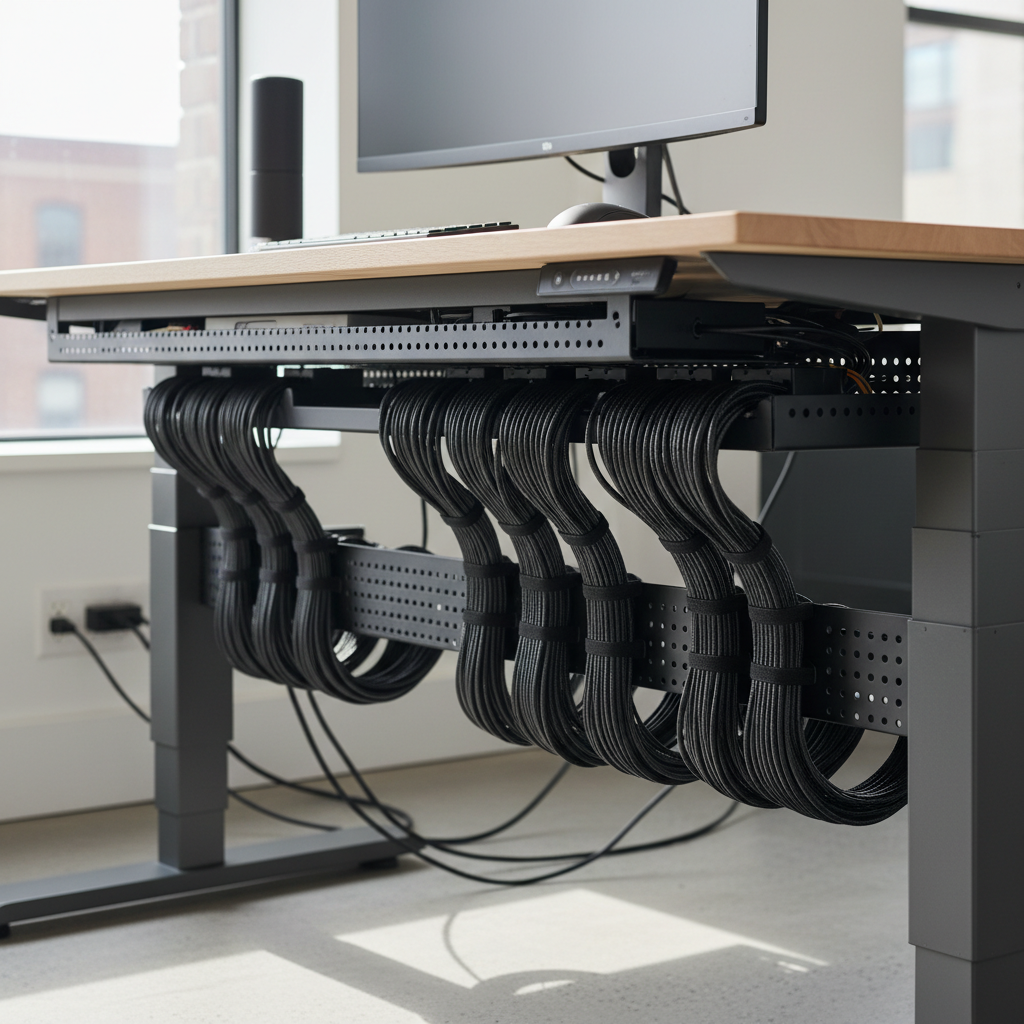
Standing desks are great for your health. But they bring a big problem: cables. When your desk moves up and down, your cables must move too. Good desk cable management keeps your workspace safe, clean, and free of tangles. This guide shows you how to manage cables on a standing desk step by step. By the end, your desk will look neat and work perfectly at every height.
Why Desk Cable Management for Standing Desks Is Different
Desk cable management for standing desks is not the same as for regular desks. A regular desk stays in one place. A standing desk moves. This means your cables must stretch, bend, and move without breaking. Let us look at why this matters.
The Unique Challenge of Moving Cables
When you raise your standing desk, every cable connected to it must get longer. When you lower it, cables must shorten or form loops. This constant motion puts stress on your cables. Without proper desk cable management, wires can pull tight, disconnect, or even break. The key is to give cables enough slack to handle the full range of motion.
Common Cable Problems with Standing Desks
Many people face these cable problems with standing desks:
- Cables that are too short when the desk is raised
- Cables getting caught under the desk frame
- Power strips falling off the desk
- Cables tangling with each other
- Wear and tear from constant bending
These problems happen because most people use the same desk cable management methods they would use on a fixed desk. That approach does not work here.
Why Standard Cable Management Fails for Standing Desks
Standard desk cable management uses tight cable ties and short cables. This works fine for a desk that does not move. But a standing desk needs flexibility. If you tie cables too tight, they cannot stretch when the desk rises. If your cables are too short, they will pull out when you stand up. Standing desk cable management needs a different approach that allows for movement.
Essential Tools and Materials for Standing Desk Cable Management
Before you start, gather the right tools. Good desk cable management starts with the right supplies. Here is what you need.
Cable Trays and Baskets
Cable trays hold multiple cables together under your desk. They attach to the desk frame and move with the desk. Choose a tray that is wide enough for all your cables. Metal baskets are strong and last long. Plastic trays are lighter and cheaper. Make sure the tray attaches to the moving part of the desk frame, not the fixed legs.
Cable Sleeves and Wraps
Cable sleeves bundle several cables into one clean line. They come in zip-up, snap-on, or wrap-around styles. For standing desk cable management, choose flexible sleeves that can bend without cracking. Neoprene sleeves work well because they stretch. Braided sleeves look clean and protect cables from wear.
Cable Ties, Clips, and Adhesive Mounts
You will need cable ties to bundle wires together. Use reusable Velcro ties instead of zip ties. Velcro ties let you add or remove cables later. Adhesive cable clips hold individual cables along the desk frame. They keep cables in place while still allowing some movement. Get clips with strong adhesive that will not fall off.
Power Strip Mounting Solutions
Your power strip needs a secure home. Mount it to the underside of the desk surface or to the desk frame. Use a power strip mount with screws or strong double-sided tape. The power strip must move with the desk. Never leave it sitting on the floor. A mounted power strip is a key part of standing desk cable management.
Step 1: Plan Your Desk Cable Layout Before Installation
Good desk cable management starts with a plan. Do not skip this step. A few minutes of planning saves hours of frustration later.
Identify the Three Zones: Static, Travel, and Floor
Think of your cable setup in three zones:
- Static Zone: This is under the desk surface. Cables here move with the desk but do not change length. Your monitor cables and USB cords live here.
- Travel Zone: This is the space between the desk and the floor. Cables here must stretch and compress as the desk moves up and down. This is the most important zone for standing desk cable management.
- Floor Zone: This is where cables reach the wall outlet. These cables stay mostly still.
Measure Cable Lengths for Your Desk’s Full Height Range
Lower your desk to its lowest position. Then raise it to its highest position. Measure the difference in height. Add this number to the length of each cable that runs from the desk to the floor. For example, if your desk moves 12 inches and your power cord is 6 feet, you need at least a 7-foot cord. This ensures desk cable management works at every height.
Map Out Cable Paths for Each Device
Before you install anything, decide where each cable will go. Draw a simple map on paper. Mark where each cable starts, where it runs, and where it ends. Group cables that go to the same place. This makes desk cable management much easier because you know exactly what goes where.
Step 2: Mount Your Power Strip to the Desk Frame
The power strip is the heart of your desk cable management system. Mounting it correctly makes everything else easier.
Choose the Right Mounting Location
Mount the power strip under the desk surface, near the back edge. This keeps it close to your devices and hides it from view. Make sure it is on the part of the desk that moves up and down. If you mount it on a fixed leg, cables will pull when the desk rises. Use a location where you can easily reach the power switch.
Install the Power Strip Securely
Follow these steps to mount your power strip:
- Hold the power strip against the underside of the desk.
- Mark the screw holes with a pencil.
- Drill small pilot holes if your desk is made of wood.
- Attach the mounting bracket with screws.
- Snap the power strip into the bracket.
If you cannot drill holes, use heavy-duty double-sided mounting tape. Press firmly and wait 24 hours before plugging anything in.
Leave a Service Loop for Full Desk Travel
The power cord that goes from the strip to the wall outlet needs extra length. Create a loose loop or coil between the desk and the floor. This loop stretches when the desk rises and compresses when it lowers. The loop should be big enough for the full height range of your desk. This is a critical part of standing desk cable management.
Step 3: Route and Bundle Cables by Zone
Now it is time to route your cables. Good desk cable management groups cables by zone to keep things organized.
Organize Cables in the Static Zone (Under Desktop)
Start with the cables that stay under the desk. These include monitor cables, USB cables, and headphone cords. Bundle them together with Velcro ties. Use adhesive clips to attach the bundle to the underside of the desk. Keep cables away from the desk frame edges where they could get pinched. Leave a little slack for each cable so you can adjust your devices.
Create Slack in the Travel Zone (Desk to Floor)
Cables in the travel zone need the most attention for desk cable management. These cables connect the desk to things on the floor, like the wall outlet or a floor-mounted power source. Use a cable spine or a loose loop to handle the movement. A cable spine is a flexible tube that bends as the desk moves. If you use a loop, make sure it hangs freely and does not touch the floor when the desk is at its lowest point.
Secure Cables in the Floor Zone
Floor zone cables are simpler because they do not move much. Use a cable sleeve to bundle them together. Run them along the baseboard or under a cable cover on the floor. This keeps them out of the way and looking clean. Plug the main power cord into the wall outlet. Leave enough length so the cord is not tight when the desk is fully raised.
Step 4: Install a Cable Management Tray or Spine
A cable tray or spine takes your desk cable management to the next level. It keeps everything neat and protects cables from damage.
Mount the Cable Tray Under Your Desk
Attach the cable tray to the desk frame using the included hardware. Position it so it sits below the desk surface but above the moving parts of the frame. The tray should be centered or slightly to one side. Make sure all screws are tight. A loose tray will wobble and could damage cables.
Route Cables Through the Tray
Place all your bundled cables into the tray. Group similar cables together. Power cables on one side, data cables on the other. This prevents interference and makes it easier to find cables later. Do not overfill the tray. Leave some space for air flow and for adding cables in the future.
Install a Cable Spine for Vertical Movement
A cable spine is a flexible channel that runs from the desk to the floor. It moves with the desk and protects cables as they travel. Mount one end of the spine to the desk frame. Let the other end rest on the floor. Thread your travel zone cables through the spine. The spine bends and stretches as the desk moves. This is one of the best solutions for standing desk cable management.
Step 5: Test Your Standing Desk Cable Setup
Testing is the final and most important step in desk cable management. Do not skip it.
Check Cable Slack at Full Standing Height
Raise your desk to its highest position. Look at every cable. Each cable should have some slack. No cable should be pulled tight. If any cable is too short, you need to replace it with a longer one or adjust the routing. This check prevents cables from disconnecting during use.
Verify No Pulling or Tension at Any Height
Slowly move the desk from its lowest to its highest position. Watch the cables the entire time. Look for any pulling, stretching, or tension. Pay special attention to where cables connect to devices. If you see tension, stop and fix it before it causes damage. Good desk cable management means no tension at any height.
Test Repeated Height Adjustments
Move the desk up and down five to ten times. Watch the cables each time. Check that nothing gets tangled, pinched, or pulled. Listen for any rubbing or scraping sounds. After the test, inspect all cable ties and clips to make sure nothing came loose. This final test confirms your desk cable management setup is solid.
Troubleshooting Common Standing Desk Cable Management Problems
Even with careful planning, problems can happen. Here is how to fix the most common ones.
Cables Too Short When Desk Is Raised
If cables are too short, you have a few options. Replace the cable with a longer one. This is the best fix. You can also add a short extension cable. For power cables, use a longer power cord rated for your device. Make sure any extension is safe and properly rated. Never use a cable that is under tension.
Cables Getting Tangled or Pinched
If cables tangle, take them all out and start over. Bundle them more tightly with Velcro ties. Use a cable sleeve to hold them together. If cables get pinched by the desk frame, reroute them away from moving parts. Add foam padding where cables touch metal edges. Proper desk cable management prevents pinching.
Power Strip Falling or Shifting
If your power strip keeps falling, the mount is not strong enough. Replace the adhesive tape with screws. If you cannot use screws, buy a stronger mounting bracket. Make sure the surface is clean and dry before attaching anything. A secure power strip mount is essential for reliable desk cable management.
Maintenance Tips for Long-Term Standing Desk Cable Management
Your desk cable management setup needs occasional care. A little maintenance keeps everything working well for years.
Periodic Cable Checks and Adjustments
Every few months, check your cables. Look for wear, fraying, or loose connections. Tighten any cable ties that have come undone. Re-seat any clips that have shifted. Move the desk through its full range while watching the cables. Fix small problems before they become big ones.
Adding New Devices to Your Setup
When you add a new device, plan its cable path before plugging it in. Use the same three-zone approach. Route the cable through the existing tray or spine. Add new Velcro ties to bundle it with existing cables. If your tray is full, consider upgrading to a larger one. Good desk cable management grows with your setup.
When to Replace Cable Management Components
Replace cable sleeves that are cracked or torn. Replace Velcro ties that have lost their grip. Replace adhesive clips that no longer stick. A cable tray that is bent or rusty should be replaced too. Fresh components keep your desk cable management system working at its best.
FAQ: Desk Cable Management for Standing Desks
How much cable slack do I need for a standing desk?
You need enough slack for the full height range of your desk plus a few extra inches. Measure your desk’s travel distance and add 4 to 6 inches of slack.
Can I use zip ties for standing desk cable management?
You can, but Velcro ties are better. Zip ties are permanent and hard to adjust. Velcro ties let you add or remove cables easily.
Do I need a cable spine for my standing desk?
A cable spine is not required, but it makes desk cable management much easier. It protects cables and keeps them organized as the desk moves.
How often should I check my cable management?
Check your cables every three to six months. Also check them any time you notice a problem, like a cable that feels tight or a device that disconnected.
What is the best power strip for a standing desk?
Choose a power strip with a short cord, surge protection, and enough outlets for all your devices. A flat-plug design saves space under the desk.
Final Tips for a Clean and Safe Standing Desk Setup
Great desk cable management makes your workspace safer and more enjoyable. Here are some final tips to remember:
- Always plan before you install. A good plan saves time and frustration.
- Use Velcro ties instead of zip ties for flexibility.
- Leave enough slack for the full range of desk motion.
- Keep cables away from moving parts of the desk frame.
- Test your setup by moving the desk up and down several times.
- Check and maintain your cable management every few months.
- Upgrade your components when they show signs of wear.
With these steps, your standing desk cable management will be clean, safe, and reliable. Enjoy your neat workspace and the health benefits of standing while you work.