

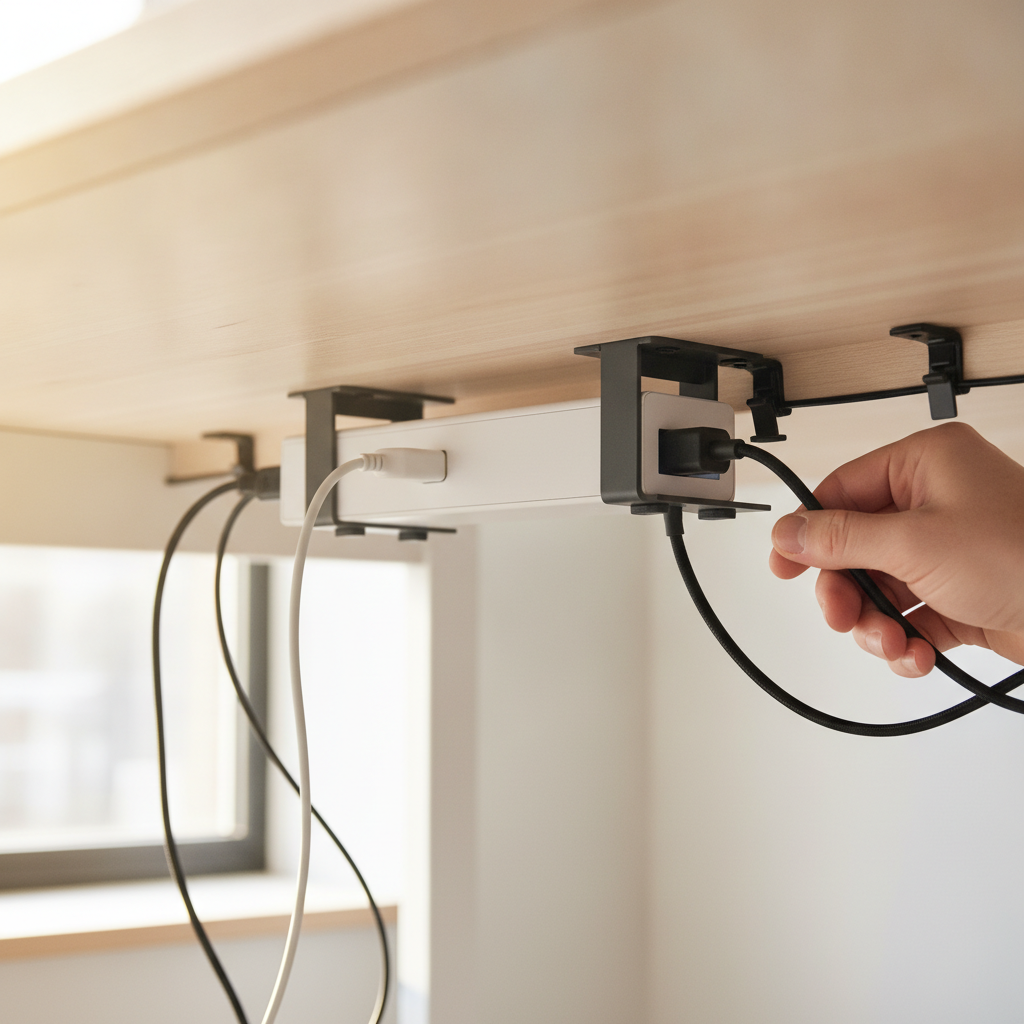
Cables on your desk floor are messy and dangerous. This under desk power strip mounting guide will show you how to fix that problem. You will learn to mount your power strip under your desk in simple steps. No matter your skill level, this guide makes under desk power strip mounting easy. By the end, your workspace will look clean and stay safe.
What You’ll Learn in This Under Desk Power Strip Mounting Guide
This under desk power strip mounting guide covers everything from start to finish. You will learn which tools you need, how to pick the best method, and how to do the job right. Let us break down what this guide offers.
Benefits of Mounting Your Power Strip Under the Desk
Mounting a power strip under your desk gives you many benefits. First, it clears floor space. You will not trip over cables anymore. Second, it protects your power strip from spills and dust. Third, it keeps your setup looking neat. Fourth, it makes plugging in devices easier since the outlets stay within reach. This under desk power strip mounting guide helps you enjoy all these perks.
Who This Guide Is For
This under desk power strip mounting guide is for anyone who wants a cleaner desk. Students, remote workers, gamers, and home office users will all benefit. You do not need special skills. If you can hold a screwdriver, you can follow this guide.
Estimated Time and Difficulty Level
The full under desk power strip mounting process takes 20 to 40 minutes. The difficulty is low. We rate it 2 out of 5. Even beginners can finish this project without help.
Tools and Materials Needed for Under Desk Power Strip Mounting
Before you start your under desk power strip mounting project, gather your tools. Having everything ready saves time and frustration.
Essential Tools for Every Mounting Method
- Power drill or screwdriver
- Measuring tape or ruler
- Pencil or marker for marking spots
- Level (a small bubble level works fine)
- Cleaning cloth and rubbing alcohol
- Safety glasses
Materials Based on Your Desk Type (Wood, Metal, Laminate, Glass)
The materials you need for under desk power strip mounting depend on your desk. Here is what to use for each type:
- Wood desks: Wood screws (1 inch), mounting bracket or power strip with keyhole slots
- Metal desks: Self-tapping metal screws, magnetic mounts, or heavy-duty adhesive
- Laminate desks: Short screws to avoid poking through, or adhesive strips
- Glass desks: Special glass-safe adhesive pads only — never drill glass
Optional Accessories for Enhanced Cable Management
To get the most from your under desk power strip mounting setup, consider these extras:
- Cable clips with adhesive backing
- Velcro cable ties
- Under desk cable tray
- Cable sleeves for bundling cords
- Zip ties for a tight hold
How to Choose the Best Mounting Method for Your Power Strip
Not every under desk power strip mounting method works for every situation. Let us look at your options so you can pick the best one.
Screw Mounting: Permanent and Heavy-Duty
Screw mounting is the strongest under desk power strip mounting method. It holds heavy power strips with many cables. You drill holes into your desk and use screws to attach the strip. This method works best for wood and metal desks. It is permanent, so think carefully about placement before you start.
Adhesive Mounting: No-Drill Solution for Renters
If you rent your space or do not want to drill, adhesive mounting is a great choice. Use heavy-duty mounting tape or adhesive strips. This under desk power strip mounting method needs a clean, flat surface. It works on wood, metal, and laminate. It does not work well on glass or textured surfaces.
Velcro or Dual Lock Mounting: Removable and Flexible
Velcro or Dual Lock strips let you remove the power strip when needed. This is the most flexible under desk power strip mounting option. You can take the strip down to clean or move it to another desk. It holds medium-weight power strips well.
Comparison Table: Cost, Durability, and Removability
| Method | Cost | Durability | Removability | Best For |
|---|---|---|---|---|
| Screw Mounting | $2–$5 | Very High | Low | Permanent setups |
| Adhesive Mounting | $5–$10 | Medium | Medium | Renters, no-drill needs |
| Velcro / Dual Lock | $8–$15 | Medium-High | High | Flexible, removable setups |
Step-by-Step Under Desk Power Strip Mounting Instructions
Now let us get to the actual work. Follow these steps for a successful under desk power strip mounting project.
Step 1: Prepare Your Workspace and Unplug All Devices
Safety comes first. Unplug every device from the power strip. Then unplug the power strip from the wall. Move your chair away from the desk. Clear items from under the desk so you have room to work. Put on safety glasses if you plan to drill.
Step 2: Choose the Optimal Mounting Location Under Your Desk
Pick a spot near the back or side edge of your desk. The location should be close to a wall outlet. Make sure the power strip will not block your legs when you sit. Leave room for the power cord to reach the wall without stretching. A good rule is to mount it 2 to 4 inches from the back edge.
Step 3: Measure and Mark the Mounting Points
Hold the power strip against the underside of your desk. Use a pencil to mark where the screw holes or mounting points go. Check that the strip sits level. Use your bubble level to confirm. If your power strip has a keyhole mounting slot, measure the distance between the slots carefully. Mark each point with a small dot.
Step 4: Mount the Power Strip Using Your Chosen Method
For screw mounting: Drill pilot holes at your marks. Use a drill bit slightly smaller than your screws. Hold the power strip in place. Drive screws through the mounting holes into the desk. Do not overtighten. Stop when the strip feels firm.
For adhesive mounting: Clean the desk surface with rubbing alcohol. Let it dry fully. Cut adhesive strips to fit. Press them onto the power strip back. Remove the protective layer. Press the strip firmly against the desk for 30 seconds.
For Velcro mounting: Apply one side of the Velcro to the power strip. Apply the other side to the desk. Press both sides firmly. Wait one hour before hanging the power strip. Then press it into place.
Step 5: Route and Secure Cables After Mounting
After under desk power strip mounting, organize your cables. Plug devices back in one at a time. Use cable clips to hold cords along the desk leg or edge. Bundle extra cable length with Velcro ties. Keep the main power cord separate from device cables to reduce clutter.
Step 6: Test Stability and Functionality
Gently tug the power strip to check it is secure. Turn on each device to confirm power flows. Make sure no cables are pinched or bent too sharply. If the strip wobbles, tighten screws or add more adhesive. Your under desk power strip mounting job is now complete.
Under Desk Power Strip Mounting for Standing Desks: Special Considerations
Standing desks need extra thought for under desk power strip mounting. The desk moves up and down, which puts stress on cables.
Calculating Cable Slack for Desk Height Adjustment
Measure the full range of your standing desk movement. Add 6 to 8 inches of extra cable length. This slack lets the desk move without pulling cables tight. If cables are too short, they will disconnect or break over time.
Creating a Service Loop to Prevent Cable Strain
A service loop is a loose coil of extra cable. Form the loop near where the power cord connects to the wall. Secure it with a cable tie, but leave it loose enough to uncoil when the desk rises. This simple trick protects your cables during under desk power strip mounting on standing desks.
Mounting Position to Avoid Interference with Desk Movement
Mount the power strip on a fixed part of the desk frame. Avoid mounting it on moving crossbars. Check the full range of motion before you drill. Raise and lower the desk by hand to confirm nothing blocks the path.
Recommended Cable Clamps for Standing Desk Setups
Use flexible cable clamps that bend with movement. Silicone cable clips work well. Spiral cable wraps also let cords stretch and compress. These accessories improve your standing desk under desk power strip mounting setup.
Cable Management Tips After Mounting Your Under Desk Power Strip
Good cable management makes your under desk power strip mounting look professional. Here are tips to keep things tidy.
Routing the Main Power Cord Along the Desk Edge
Run the main power cord along the desk edge or leg. Use adhesive cable clips every 6 to 8 inches. This keeps the cord out of the way and prevents tripping. Route it toward the nearest wall outlet.
Using Cable Clips and Ties for a Clean Setup
Group cables that go to the same device. Use Velcro ties to bundle them. Clip each bundle to the desk underside. Label each bundle if you have many devices. This makes troubleshooting easier later.
Bundling Device Cords to Prevent Tangles
Loose cables tangle easily. Bundle monitor, keyboard, and charger cords together. Use a cable sleeve to wrap the bundle. This looks clean and protects the cables from damage.
Hiding Excess Cable Length Under the Desk
Coil extra cable length into a neat circle. Secure the coil with a zip tie. Tuck it behind the desk leg or inside a cable tray. Never leave excess cable hanging loose.
Common Mistakes to Avoid When Mounting a Power Strip Under Your Desk
Learning from others’ mistakes makes your under desk power strip mounting smoother. Avoid these common errors.
Skipping Surface Preparation for Adhesive Mounts
Dust and oil stop adhesive from sticking. Always clean the surface with rubbing alcohol first. Let it dry completely. This step takes 2 minutes but prevents your power strip from falling later.
Over-Tightening Screws on MDF or Laminate Desks
MDF and laminate crack easily. Drive screws until they feel snug, not tight. If you feel resistance, stop. Use a drill with a torque limiter if possible. Over-tightening is a top mistake in under desk power strip mounting.
Ignoring Standing Desk Clearance Requirements
If you have a standing desk, check clearance before mounting. The power strip must not touch the crossbar or frame at any height. Measure twice, mount once.
Mounting the Power Strip in the Wrong Orientation
Think about which direction the outlets should face. Face them toward the back or side for easy access. If outlets face the floor, plugging in devices becomes difficult. Plan orientation before your under desk power strip mounting begins.
Failing to Leave Enough Cable Slack
Tight cables break and disconnect. Always leave slack in every cord. This is especially important for standing desks but matters for all setups.
Troubleshooting Under Desk Power Strip Mounting Issues
Sometimes things go wrong. Here are solutions to common under desk power strip mounting problems.
Power Strip Keeps Falling Off the Desk
If your power strip falls, the adhesive may not have bonded well. Clean the surface again. Use fresh adhesive strips. For a stronger hold, switch to screw mounting. Make sure the surface is flat and smooth before trying again.
Cables Getting Caught When Adjusting Desk Height
Re-route cables with more slack. Add a service loop. Move cable clips to give cords room to move. Check that no cord runs across a moving joint.
Adhesive Not Sticking to Your Desk Surface
Some surfaces resist adhesive. Textured or powder-coated surfaces are common problems. Try a primer pad that comes with mounting tape. Or switch to screws or Velcro for your under desk power strip mounting.
Outlets Facing the Wrong Direction After Mounting
If outlets face the wrong way, remount the strip. Flip it upside down or rotate it 90 degrees. Some power strips allow side mounting. Check the design before you drill new holes.
Maintenance Tips for Your Under Desk Power Strip Mount
Your under desk power strip mounting needs occasional check-ups. Simple maintenance keeps everything safe and working.
How Often to Check Screw Tightness and Adhesive Bond
Check screws every 3 to 6 months. Wood desks may loosen over time. For adhesive mounts, check monthly for the first 3 months. Then check every 6 months. Pull gently on the strip to test the bond.
When to Replace Worn Velcro or Dual Lock Fasteners
Velcro loses grip after many uses. Replace it when the strip feels loose or slides. Dual Lock lasts longer but also wears out. Plan to replace fasteners every 1 to 2 years for best results in your under desk power strip mounting setup.
Cleaning and Inspecting Your Mounted Power Strip
Unplug the strip before cleaning. Wipe it with a dry cloth. Check for frayed wires, burn marks, or loose outlets. If you see damage, replace the power strip right away. Never use a damaged power strip.
Signs It’s Time to Remount or Upgrade Your Power Strip
Remount if the strip moves or hangs loose. Upgrade if you need more outlets, USB ports, or surge protection. A good power strip lasts 3 to 5 years. If yours is older, consider a new one during your next under desk power strip mounting project.
FAQ: Common Questions About Under Desk Power Strip Mounting
Is It Safe to Mount a Power Strip Under a Wooden Desk?
Yes. Mounting a power strip under a wooden desk is safe. Use screws for a strong hold. Make sure the power strip has surge protection. Keep it away from heat sources. This is one of the most common and safe under desk power strip mounting setups.
Can I Mount a Power Strip Under a Glass or Metal Desk?
Yes, but with care. Glass desks need special adhesive pads. Never drill into glass. Metal desks work with screws, magnetic mounts, or heavy-duty adhesive. Each desk type needs the right under desk power strip mounting method.
What’s the Best Height to Mount a Power Strip Under My Desk?
Mount it near the back edge, about 2 to 4 inches from the edge. Place it high enough that your legs do not hit it. But keep it low enough that cables can reach devices on the desk. The ideal spot is where you can reach it without bending too far.
How Do I Remove a Power Strip Without Damaging My Desk?
For screws, simply unscrew them. Fill holes with wood filler if needed. For adhesive, use a hair dryer to warm the tape. Pull slowly at a low angle. For Velcro, peel it apart and clean any leftover adhesive with rubbing alcohol.
Should I Mount One Power Strip or Multiple Under My Desk?
One power strip is enough for most setups. If you have many devices or a large desk, two strips may help. Mount them on opposite sides. Do not daisy-chain power strips together. This is a fire hazard. Each strip should plug into its own wall outlet.
Conclusion: Enjoy a Cleaner, Safer Desk Setup with Your Mounted Power Strip
Under desk power strip mounting is a simple project with big rewards. You get a cleaner floor, safer workspace, and better-looking setup. Follow the steps in this under desk power strip mounting guide. Pick the method that fits your desk and your needs. Take your time with measuring and preparation. Test everything when you finish.
Remember to check your mount every few months. Replace worn parts before they fail. With proper care, your under desk power strip mounting will last for years. Start today and enjoy the difference a clean, organized desk makes.