

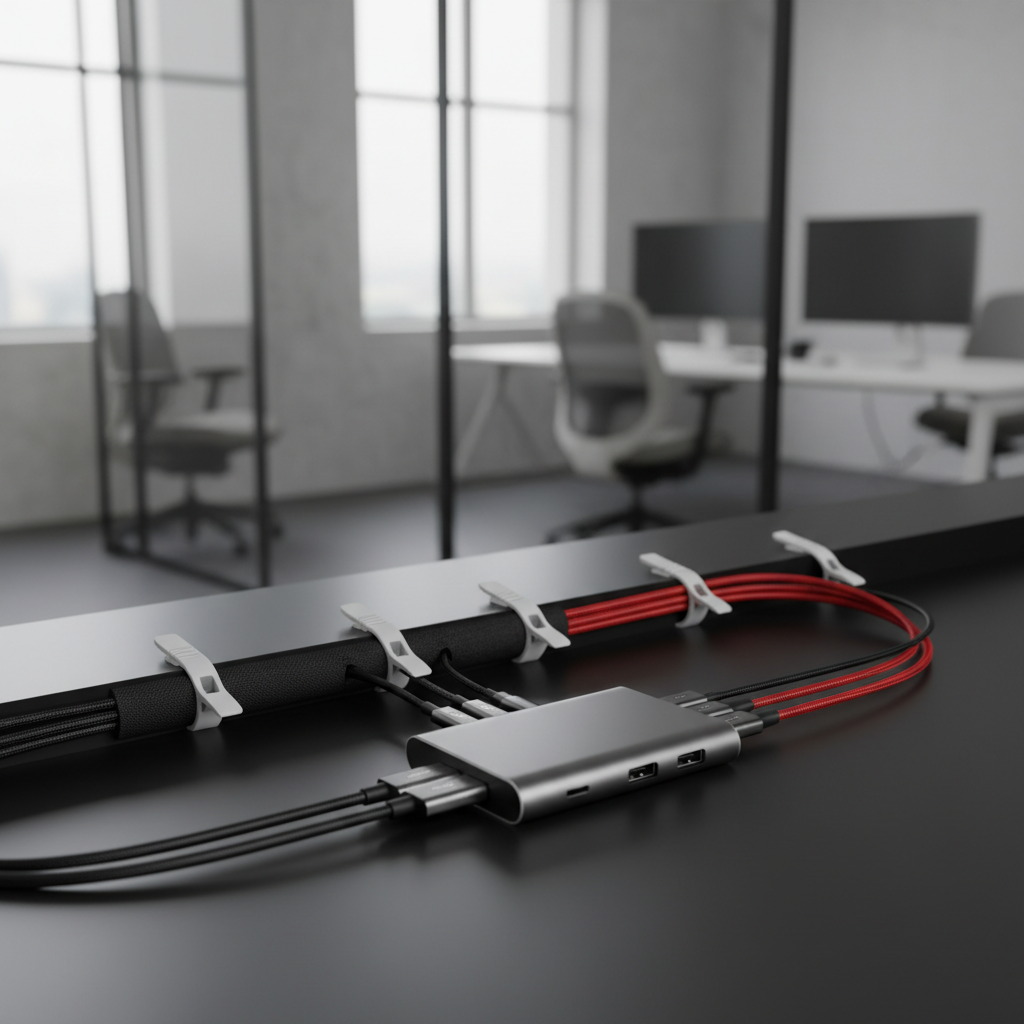
A messy desk with tangled cables makes work harder. A USB-C hub adds more ports to your laptop or computer. But without good USB-C hub cable management, your setup looks chaotic. This guide shows you how to organize every cable step by step. You will learn to route cables cleanly, hide your hub, and keep everything working well. By the end, your desk will look professional and work better.
What You’ll Need: USB-C Hub Cable Management Tools & Supplies
Before you start your USB-C hub cable management project, gather the right tools. Having everything ready saves time and frustration.
Essential Cable Management Tools for Your USB-C Hub Setup
You need basic tools for any USB-C hub cable management job:
- Velcro cable ties (reusable and adjustable)
- Cable sleeves or wrap (neoprene or braided)
- Under-desk cable tray or mesh basket
- Adhesive cable clips or hooks
- Scissors or cable cutters
- Measuring tape
- Label maker or masking tape for marking
2026 Must-Have Accessories: Magnetic Organizers, Modular Trays & Cable Spines
Modern USB-C hub cable management uses smart accessories:
- Magnetic cable holders that snap together
- Modular under-desk trays you can expand
- Silicone cable spines for standing desks
- J-channel raceways for wall or desk edge routing
- Cable management boxes to hide power strips
Choosing the Right Cable Lengths for Your USB-C Hub Configuration
Wrong cable lengths ruin USB-C hub cable management. Measure the distance from your hub to each device. Add 6-12 inches of slack for movement. Too-short cables pull and disconnect. Too-long cables create tangles. For standing desks, buy cables 2-3 feet longer than your maximum desk height.
Step 1: Audit and Plan Your USB-C Hub Cable Layout
Good USB-C hub cable management starts with planning. Don’t connect anything yet. First, understand what you have.
Map Every Device Connection and Cable Destination
List every device you will connect to your USB-C hub. Write down each cable type and where it goes. Common connections include monitors, keyboards, mice, external drives, ethernet, and card readers. Draw a simple diagram showing your hub in the center with lines to each device. This map guides your USB-C hub cable management decisions.
Separate Power and Data Cables for Cleaner Routing and Signal Integrity
Power cables carry electricity. Data cables carry information. Running them together causes interference. In your USB-C hub cable management plan, keep power cables on one side and data cables on the other. This separation improves performance and makes troubleshooting easier. USB-C power delivery cables are thick and stiff. Route them separately from thin data cables.
Identify Permanent vs. Frequently Swapped Connections
Some devices stay connected forever. Others plug and unplug often. Monitor cables and ethernet are usually permanent. USB drives and card readers get swapped daily. In your USB-C hub cable management system, put permanent cables in fixed positions. Put frequently-used ports in easy-to-reach spots. This planning makes daily use smoother.
Step 2: Position Your USB-C Hub for Optimal Cable Management
Where you place your hub affects your entire USB-C hub cable management system. The right spot balances access, appearance, and function.
Hub Placement Strategies: Behind Monitor, Under Desk, or Desktop Edge?
Three common positions work for USB-C hub cable management:
- Behind monitor: Hides the hub completely. Works if your monitor has VESA mount space. Cables run straight down.
- Under desk: Keeps desk surface clean. Mount a tray to hold the hub. Best for permanent setups.
- Desktop edge: Easy access for swapping devices. Use a hub stand or small tray. Good if you change connections often.
Managing Hub Heat and Airflow During Cable Routing
USB-C hubs generate heat, especially when charging devices. Your USB-C hub cable management must allow airflow. Don’t wrap cables tightly around the hub. Leave 1-2 inches of space on all sides. If using an under-desk tray, choose one with holes or mesh. Never cover the hub with a solid box without ventilation.
Accessibility vs. Concealment: Finding the Right Balance for Your Workflow
Perfect USB-C hub cable management hides cables but keeps ports reachable. If you plug in USB drives daily, hide the hub but leave ports accessible. Use a hub with front-facing ports mounted at desk edge. If you rarely change connections, hide everything under the desk. Match your setup to how you actually work.
Step 3: Route Thick USB-C Power Delivery Cables the Right Way
USB-C power delivery cables are different from regular cables. They’re thicker, stiffer, and carry more power. Your USB-C hub cable management must handle them carefully.
Why USB-C PD Cables Need Special Handling in Cable Management
USB-C PD cables have thick wires inside to carry high power. Bending them sharply damages internal wiring. A damaged PD cable charges slowly or fails completely. In your USB-C hub cable management system, treat these cables with extra care. Never kink them or pinch them under heavy objects.
Avoiding Sharp Bends: Slack Loop Techniques for Thick PD Cables
Create gentle curves when routing USB-C PD cables. Make a loose loop with at least 3-inch radius before the cable enters the hub. Use velcro ties to hold the loop in place. This slack loop technique prevents strain on the connector. For USB-C hub cable management on standing desks, add extra slack to allow height changes.
Choosing the Right Sleeve or Raceway Diameter for USB-C PD Cables
USB-C PD cables need larger sleeves than data cables. Measure your cable diameter and add 0.5 inches. A 0.4-inch cable needs at least 0.9-inch sleeve. If bundling multiple PD cables, measure the total bundle size. Your USB-C hub cable management works better when cables fit loosely in sleeves. Tight sleeves make cables hard to remove later.
Step 4: Install the Layered USB-C Hub Cable Management System
A layered approach makes USB-C hub cable management cleaner and more organized. Each layer handles a different part of the cable run.
Layer 1 — Tame Cables at the Source with Velcro Ties and Bundling
Start USB-C hub cable management right at the hub. Group cables by type: power, data, video. Use velcro ties to bundle cables going to the same area. Leave enough slack so devices can move slightly. Don’t pull cables tight. Label each bundle if you have multiple similar cables. This first layer prevents tangles before they start.
Layer 2 — Route to an Under-Desk Cable Tray or J-Channel Raceway
After bundling at the hub, route cables to a central path. An under-desk cable tray holds all bundles together. Mount the tray 4-6 inches below the desk edge. Lay cables flat in the tray without overlapping. If you don’t have a tray, use J-channel raceway along the desk edge. This second layer of USB-C hub cable management keeps cables off the floor.
Layer 3 — Handle the Floor Run with a Cable Spine or Wall Raceway
Cables going to floor outlets or wall power need protection. Use a cable spine for vertical runs from desk to floor. A cable spine bends and flexes, perfect for standing desks. For fixed desks, wall raceway covers cables running along baseboards. This final layer completes your USB-C hub cable management system from hub to power source.
Step 5: Manage USB-C Hub Cables on a Standing Desk
Standing desks add complexity to USB-C hub cable management. Cables must stretch and compress as the desk moves.
Silicone Cable Spines: The 2026 Standard for Sit-Stand Desk Setups
Silicone cable spines are the best solution for standing desk USB-C hub cable management. The spine attaches to the desk leg and floor. Cables run through the spine’s channels. As the desk moves up or down, the spine flexes. This keeps cables protected and organized at all heights. Choose a spine with enough channels for all your cables.
Calculating the Right Cable Slack for Full Height Adjustment Range
Measure your desk’s full height range. Add 12 inches of extra cable length for safety loops. For example, if your desk moves from 28 to 48 inches, you need cables with 32 inches of slack. In your USB-C hub cable management setup, create a service loop under the desk. This loop absorbs the height change without pulling cables tight.
Magnetic Cable Holders for Quick-Disconnect Peripherals on Moving Desks
Some peripherals like headphones or phone chargers get unplugged often. Use magnetic cable holders on the desk edge. The magnet holds the cable when not in use. When you need the device, pull the cable free. The magnetic holder keeps the cable end accessible. This USB-C hub cable management trick prevents cables from falling under the desk.
Step 6: Hide Your USB-C Hub Without Overheating It
Hiding your hub improves desk appearance. But poor USB-C hub cable management can cause overheating.
No-Drill Under-Desk Tray Mounting for Hub Concealment
If you can’t drill holes, use adhesive mounting tape. Clean the desk bottom with alcohol first. Apply heavy-duty mounting tape to the tray edges. Press firmly for 30 seconds. Wait 24 hours before loading the tray. This method works for USB-C hub cable management in rental spaces. Choose trays rated for your hub’s weight plus cables.
Ventilation Gaps: How Much Airflow Space Your Hub Actually Needs
Your USB-C hub needs breathing room. Leave at least 1 inch of space above and below the hub. If the hub has vents on the sides, keep those clear too. In your cable management tray, position the hub so air can circulate. Don’t stack other devices on top. A hot hub slows down data transfer and can damage connected devices.
Desk Material Compatibility: Adhesive vs. Screw Mounting Options
Desk material affects your USB-C hub cable management mounting choice. Solid wood desks work with screws or strong adhesive. Glass desks need special adhesive pads designed for smooth surfaces. Laminate desks accept screws if you pre-drill holes. Particle board holds screws poorly, so use adhesive or through-bolts. Always check the manufacturer’s recommendations before mounting.
Common USB-C Hub Cable Management Mistakes to Avoid
Learning from others’ mistakes saves time and money. These are the most common USB-C hub cable management errors.
Bundling Power and Data Cables Together (and How to Fix It)
Mixing power and data cables causes signal interference. You might see monitor flickering or slow data transfer. The fix is simple: separate them. Use different cable trays or sleeves for each type. If you must run them together, use shielded cables. Proper separation is a key part of good USB-C hub cable management.
Over-Tightening Thick USB-C PD Cables and Damaging Internal Wiring
Tight cable ties crush USB-C PD cables. This damages the thick wires inside. The cable might work at first but fail later. Always use velcro ties instead of zip ties. Tighten just enough to hold the bundle. You should be able to slide the cables slightly. Gentle handling protects your investment in USB-C hub cable management.
Blocking Hub Ports While Trying to Hide It Completely
Some people hide the hub so well they can’t use it. Don’t cover the ports with cables or objects. Your USB-C hub cable management should hide the device but keep ports accessible. Test every port after setup. If you can’t reach a port easily, reposition the hub. Function matters more than perfect appearance.
Maintaining Your USB-C Hub Cable Management Setup
Good USB-C hub cable management needs occasional maintenance. Small fixes prevent big problems later.
Monthly Cable Check: What to Inspect and Re-Tighten
Every month, check your USB-C hub cable management system. Look for loose velcro ties and re-tighten them. Check cable connectors for dust or damage. Make sure the hub isn’t touching the tray bottom. Verify all devices still work properly. This 5-minute check keeps your setup running smoothly.
Updating Your Cable Management When Adding New Devices
When you add a new device, update your USB-C hub cable management. Route the new cable along existing paths. Add it to the appropriate bundle. Update your cable map if you made one. Don’t just drape the new cable over existing ones. Take time to integrate it properly into your system.
Labeling Tips for Long-Term USB-C Hub Organization
Labels make troubleshooting faster. Label both ends of every cable. Use a label maker or write on masking tape. Include the device name and connection type. Place labels 2-3 inches from the connector. This USB-C hub cable management habit saves hours when something stops working.
FAQ: USB-C Hub Cable Management Questions Answered
How Do I Manage a USB-C Hub With 10 or More Cables?
Large USB-C hub cable management needs extra organization. Use a larger cable tray or multiple trays. Group cables by function: all video cables together, all USB devices together. Use a cable management box to hide the power strip. Consider a hub with fewer ports but higher quality. Sometimes two smaller hubs work better than one large one.
Can I Achieve Clean USB-C Hub Cable Management Without an Under-Desk Tray?
Yes, you can manage cables without a tray. Use adhesive cable clips along the desk edge. Route cables through J-channel raceway under the desk. Use a cable management box on the floor. These alternatives work for USB-C hub cable management in small spaces. The key is keeping cables off the floor and organized.
What’s the Best Way to Hide a USB-C Hub on a Glass or Solid Wood Desk?
Glass desks need special USB-C hub cable management. Use a hub stand that matches the glass color. Route cables through the stand’s built-in channels. For solid wood desks, mount the hub underneath with screws. Use a wooden cover plate to hide the mounting hardware. Both methods keep the hub accessible but out of sight.
Good USB-C hub cable management transforms your workspace. You now know how to plan, route, and maintain a clean setup. Start with the planning step. Gather your tools. Follow each step carefully. Your desk will look professional and work better. Take action today and enjoy the results tomorrow.