

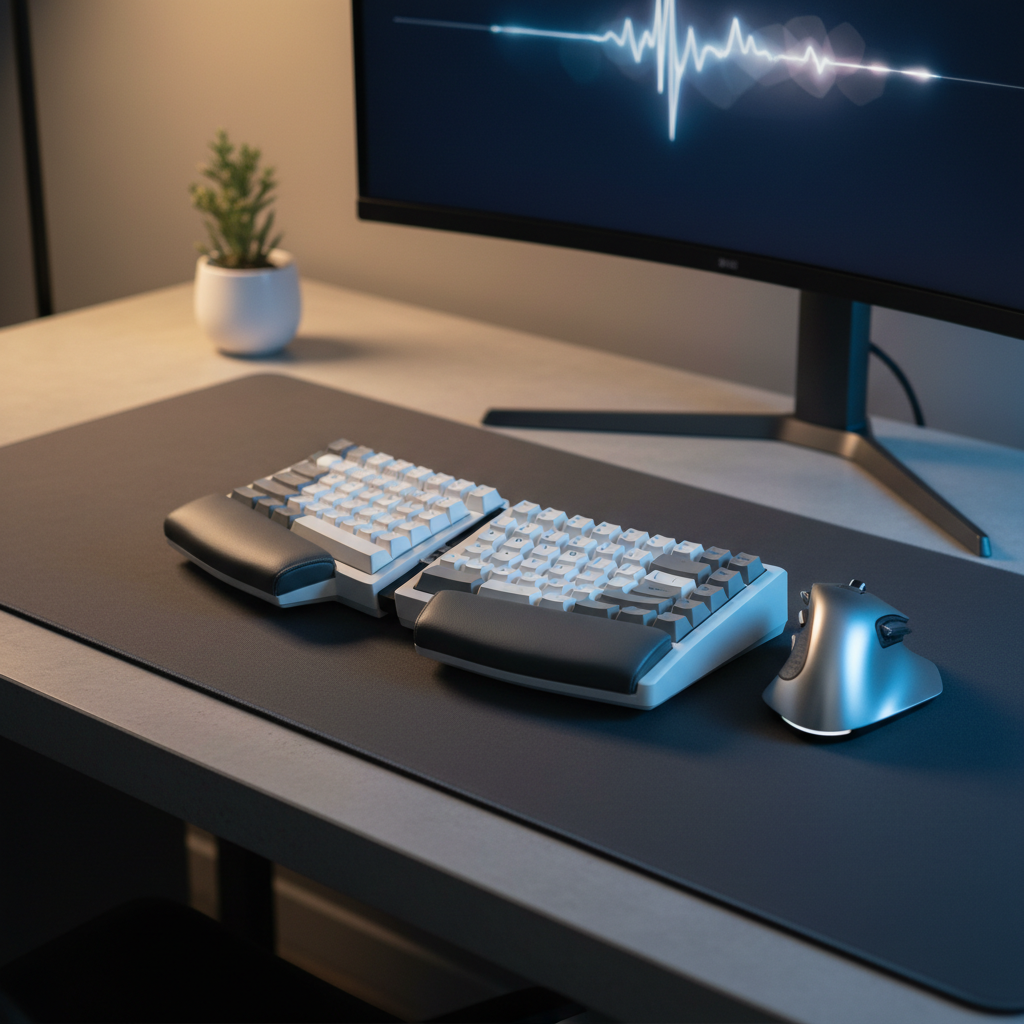
If you spend hours at a computer every day, your wrists and hands may start to hurt. This is a common problem. The good news is that the right desk setup can fix it. This Alice keyboard ergonomics guide will show you how to set up your desk for maximum comfort. You will learn what makes the Alice layout special, how to place it on your desk, and how to get used to it step by step. By the end of this guide, you will have a clear plan for a pain-free workspace.
Quick Overview: What Makes the Alice Keyboard Ergonomic?
The Alice keyboard is a type of ergonomic keyboard. It has a curved, split design that follows the natural angle of your hands. Unlike a flat keyboard, the Alice layout keeps your wrists in a neutral position. This means your hands rest at a comfortable angle without bending. Alice keyboard ergonomics focuses on reducing strain on your wrists, fingers, and shoulders.
How the Alice Layout Reduces Wrist Strain
When you type on a standard keyboard, your wrists bend outward. Over time, this causes pain and even injury. The Alice keyboard splits the keys into two groups. Each group angles toward your hands. This keeps your wrists straight while you type. Your fingers also reach the keys more naturally. Less bending means less strain. This is the core idea behind Alice keyboard ergonomics.
Alice vs. Split vs. Standard Keyboards: Ergonomic Comparison
| Feature | Standard Keyboard | Split Keyboard | Alice Keyboard |
|---|---|---|---|
| Wrist Angle | Bent outward | Straight | Straight with natural curve |
| Hand Position | Close together | Shoulder-width apart | Angled and relaxed |
| Learning Curve | None | 1-2 weeks | 2-4 weeks |
| Best For | Casual use | Wide desks | All-day typing comfort |
| Portability | High | Low | Medium |
As the table shows, the Alice keyboard offers a balance between comfort and usability. It is not as extreme as a full split keyboard, but it gives much better wrist support than a standard flat keyboard.
Who Should Use an Alice Keyboard?
Alice keyboard ergonomics is helpful for many people. If you type for more than four hours a day, this keyboard can reduce pain. Writers, programmers, students, and office workers all benefit from it. If you already feel wrist pain or numbness, switching to an Alice layout may help. Even if you have no pain now, using an Alice keyboard can prevent problems in the future.
How to Set Up Your Desk for Alice Keyboard Ergonomics
A good desk setup is just as important as the keyboard itself. Even the best ergonomic keyboard will not help if your desk height or chair position is wrong. Follow these steps to create a complete Alice keyboard ergonomics workstation.
Ideal Desk Height and Chair Position for Alice Keyboards
- Step 1: Set your chair height. Sit with your feet flat on the floor. Your knees should form a 90-degree angle. Adjust the chair until this feels natural.
- Step 2: Check your elbow position. Place your hands on the keyboard. Your elbows should be at a 90 to 110-degree angle. If your shoulders shrug up, lower your chair or raise your desk.
- Step 3: Adjust desk height. The desk surface should be at or just below elbow height. Most desks are 28 to 30 inches tall. If yours is too high, use a keyboard tray or raise your chair with a footrest.
- Step 4: Sit back in your chair. Your back should touch the backrest. This supports your spine and keeps your shoulders relaxed.
Keyboard Placement: Flat, Tented, or Negative Tilt?
The Alice keyboard can sit in three positions on your desk:
- Flat: The keyboard lies level on the desk. This is the simplest setup. It works well for beginners who are new to Alice keyboard ergonomics.
- Tented: The middle of the keyboard is raised. This angles your hands inward like a prayer position. Tenting reduces forearm rotation and is great for long typing sessions.
- Negative Tilt: The front edge of the keyboard is higher than the back. This tilts your hands slightly downward. It is the best option for reducing wrist extension.
For most users, a slight tent of 10 to 15 degrees gives the best comfort. You can use a tenting kit or place small objects under the center of the keyboard to create this angle.
Monitor Height and Mouse Positioning for a Complete Setup
- Step 1: Position your monitor. The top of your screen should be at or slightly below eye level. Sit about an arm’s length away from the screen.
- Step 2: Center the monitor. Place it directly in front of you. If you use two screens, put the main one in front and the second one to the side.
- Step 3: Place your mouse. Keep the mouse close to the keyboard. Your arm should not reach far to use it. An ergonomic mouse that fits your hand size works best with Alice keyboard ergonomics.
- Step 4: Check your gaze. Look at the screen. Your eyes should fall on the upper third of the display. This keeps your neck in a neutral position.
Wrist Rests, Arm Supports, and Other Accessories
Accessories make a big difference in your Alice keyboard ergonomics setup. Here are the key items to consider:
- Wrist rest: A padded rest supports your wrists between typing bursts. Choose one that matches the curve of your Alice keyboard. Your wrists should float above the rest while typing and rest on it only when paused.
- Arm supports: Padded arm rests on your chair help take weight off your shoulders. Adjust them so your forearms rest gently without pushing your shoulders up.
- Desk mat: A large desk mat keeps your keyboard and mouse on a smooth surface. It also adds cushion for your forearms.
- Cable management: Route cables behind the desk. A clean workspace reduces distractions and lets you position your keyboard freely.
How to Transition to an Alice Keyboard: A Step-by-Step Plan
Switching to an Alice keyboard takes time. Your brain and muscles need to learn new positions. Do not rush. Follow this four-week plan for a smooth transition to Alice keyboard ergonomics.
Week 1: Adjusting to the Split Key Clusters
- Step 1: Use the Alice keyboard for one hour each day. Use your old keyboard for the rest of the day.
- Step 2: Focus on home row keys first. Place your fingers on F and J. Feel the new angle of your hands.
- Step 3: Type simple words and short sentences. Do not worry about speed. Focus on hitting the right keys.
- Step 4: Take a five-minute break every 25 minutes. Stretch your fingers and shake out your hands.
Week 2: Mastering the Split Spacebar and Thumb Keys
- Step 1: Increase Alice keyboard use to two hours per day.
- Step 2: Practice the split spacebar. Use your left thumb for the left half and your right thumb for the right half.
- Step 3: Work on thumb cluster keys like Enter, Backspace, and Shift. These are different from a standard keyboard.
- Step 4: Try typing full paragraphs. Accept that your speed will drop. This is normal.
Weeks 3–4: Building Speed and Muscle Memory
- Step 1: Use the Alice keyboard for your full workday.
- Step 2: Practice typing drills for 15 minutes each day. Use free typing websites to track your progress.
- Step 3: Start using common shortcuts like Ctrl+C and Ctrl+V. These may feel different on the Alice layout.
- Step 4: By the end of Week 4, your typing speed should reach 70 to 80 percent of your old speed. Full speed usually returns within six to eight weeks.
Common Transition Mistakes and How to Fix Them
- Mistake 1: Trying to type too fast too soon. This leads to frustration and errors. Slow down and focus on accuracy first.
- Mistake 2: Going back to the old keyboard. Each switch resets your muscle memory. Commit to the Alice keyboard for at least two weeks.
- Mistake 3: Ignoring pain. Mild discomfort is normal at first. Sharp pain is not. If you feel sharp pain, check your desk height and hand position.
- Mistake 4: Skipping breaks. Your hands need rest during the transition. Take breaks every 25 to 30 minutes.
How to Remap Your Alice Keyboard for Better Ergonomics
One of the biggest advantages of Alice keyboard ergonomics is the ability to remap keys. Most Alice keyboards support custom firmware. This lets you change what each key does. Smart remapping can further reduce strain and boost productivity.
Key Remapping Strategies to Reduce Pinky and Wrist Strain
- Step 1: Move heavy-use keys. Keys like Enter, Backspace, and Shift are often hit by your pinky. Remap them to the thumb cluster. Your thumbs are stronger and can handle more presses.
- Step 2: Duplicate modifier keys. Place Ctrl and Alt on both sides of the keyboard. This way, you do not need to stretch one hand across the board.
- Step 3: Use tap-hold keys. Set a key to type a letter when tapped and act as a modifier when held. For example, tapping could type “A” while holding activates Shift. This reduces the total number of keys you need to reach.
Recommended Software and Firmware for Alice Keyboards
| Software/Firmware | Type | Best For |
|---|---|---|
| QMK | Open-source firmware | Full customization on supported boards |
| VIA | GUI remapping tool | Easy visual key remapping |
| ZMK | Wireless firmware | Bluetooth Alice keyboards |
| Karabiner (Mac) | System-level remapping | Non-QMK keyboards on macOS |
| AutoHotkey (Windows) | Script-based remapping | Advanced Windows users |
For most users, VIA is the easiest starting point. It works with many Alice keyboards and lets you change keys through a simple web interface. QMK offers deeper control if your keyboard supports it.
Layer and Modifier Setup for Productivity Workflows
- Step 1: Create a base layer. This is your normal typing layout. Keep it simple.
- Step 2: Add a function layer. Hold a thumb key to access F1 through F12, arrow keys, and media controls. Place arrow keys under your right hand on the home row for easy access.
- Step 3: Add a number layer. Put numbers on a separate layer under your left hand. This keeps your right hand free for the mouse.
- Step 4: Test your layers. Type a full document using all layers. Adjust any key that feels awkward.
Good layer design is a key part of Alice keyboard ergonomics. It lets you keep your hands in one position and still reach every key you need.
Alice Keyboard Ergonomics for Different Home Office Setups
Not every home office looks the same. Your desk size, screen count, and work style all affect how you set up Alice keyboard ergonomics. Here are tips for three common setups.
Dual Monitor and Laptop + External Display Configurations
- Step 1: Place your main monitor directly in front of you. This is where you spend most of your time.
- Step 2: Put the second monitor to the side of your dominant hand. Angle it toward you at about 30 degrees.
- Step 3: Center the Alice keyboard in front of your main monitor. Do not place it between the two screens. This causes neck strain.
- Step 4: If using a laptop as a second screen, place it on a stand at the same height as your monitor. Use the laptop screen for reference only, not for active work.
Standing Desk and Keyboard Tray Arrangements
- Step 1: Set the standing desk height so your elbows are at 90 degrees when your hands rest on the keyboard.
- Step 2: Use an anti-fatigue mat. This reduces leg and back strain during long standing sessions.
- Step 3: If your desk has a keyboard tray, make sure it is wide enough for the Alice layout. The curved shape needs more space than a flat keyboard.
- Step 4: Alternate between sitting and standing every 30 to 60 minutes. This is better for your back than standing all day.
Compact Desk and Minimalist Home Office Tips
- Step 1: Choose a 75 percent or 65 percent Alice keyboard. These smaller versions save desk space while keeping the ergonomic benefits.
- Step 2: Use a monitor arm to lift your screen off the desk. This frees up space for your keyboard and mouse.
- Step 3: Mount a keyboard tray under the desk if surface space is tight. This is one of the best Alice keyboard ergonomics solutions for small desks.
- Step 4: Keep only essential items on your desk. A clean surface lets you position the keyboard in the best ergonomic spot.
FAQ: Common Questions About Alice Keyboard Ergonomics
Q1: Is the Alice keyboard good for gaming?
Yes. Many gamers use Alice keyboards for long sessions. The ergonomic design reduces hand fatigue. However, the split layout may take time to get used to for fast-paced games.
Q2: Can I use a regular mouse with an Alice keyboard?
Yes. Any mouse works with an Alice keyboard. For the best results, pair it with an ergonomic mouse that matches the hand angle of your keyboard.
Q3: How long does it take to get used to an Alice keyboard?
Most people feel comfortable after two to four weeks. Full speed recovery takes six to eight weeks. Consistent daily use speeds up the process.
Q4: Do I need a special wrist rest for an Alice keyboard?
A wrist rest made for the Alice layout works best. Standard wrist rests may not match the curve. Look for one designed for split or ergo keyboards.
Q5: Will Alice keyboard ergonomics help with carpal tunnel syndrome?
It can help reduce symptoms by keeping your wrists in a neutral position. However, it is not a medical treatment. See a doctor if you have persistent pain or numbness.
Q6: Are wireless Alice keyboards as good as wired ones?
Modern wireless Alice keyboards have very low latency. For typing and office work, you will not notice a difference. For competitive gaming, a wired connection is still slightly better.
Conclusion and Final Recommendations
Setting up your desk for Alice keyboard ergonomics is one of the best things you can do for your long-term health. The curved, split design keeps your wrists straight and reduces strain on your hands and shoulders. Start with the right desk height and chair position. Then fine-tune your keyboard placement, monitor height, and accessories. Follow the four-week transition plan to build speed and muscle memory. Use key remapping to make the keyboard work even better for your hands.
Remember these key takeaways:
- Keep your wrists straight and your elbows at 90 degrees.
- Take breaks every 25 to 30 minutes during the transition.
- Remap keys to reduce pinky strain and boost productivity.
- Adjust your setup for your specific desk and screen configuration.
- Be patient. Comfort and speed will come with consistent practice.
Your hands carry you through every workday. Investing time in proper Alice keyboard ergonomics today will pay off for years to come. Start with one change this week, and build from there. Your future self will thank you.