

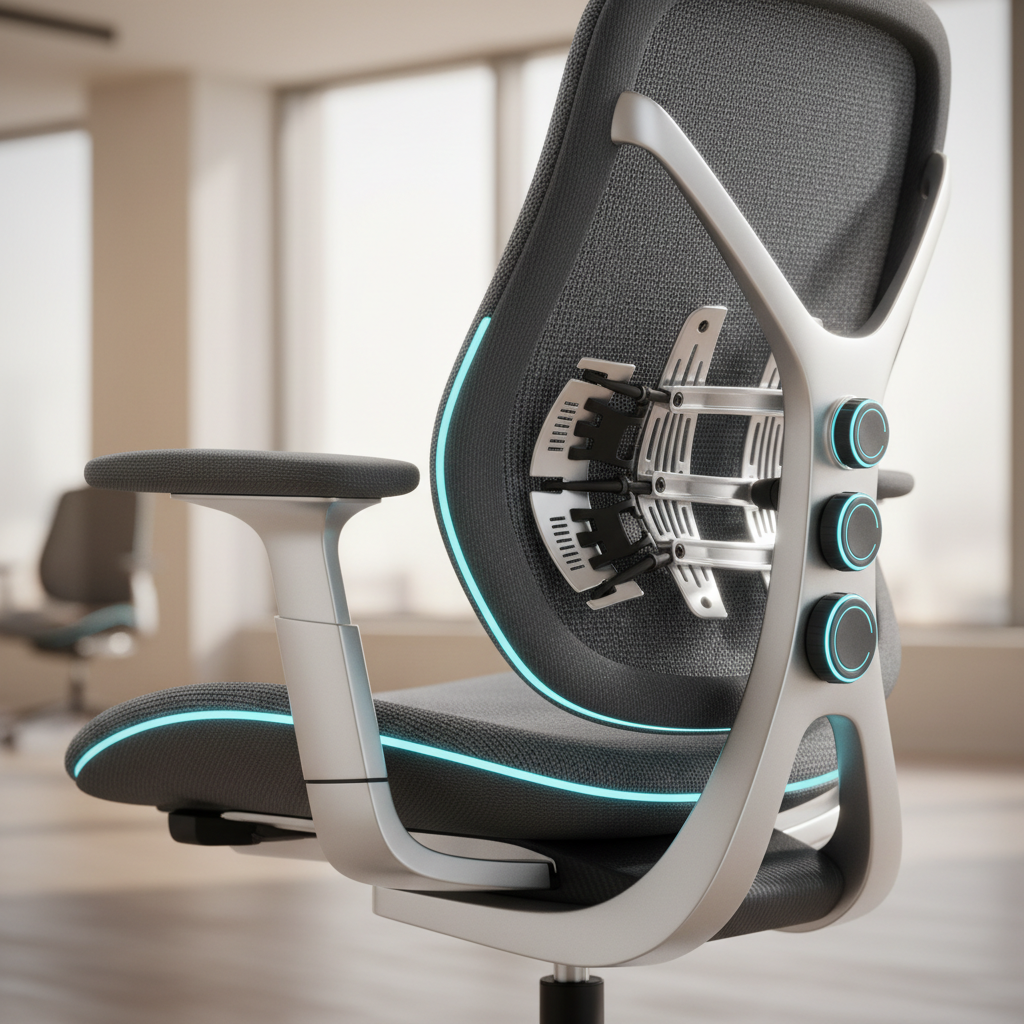
Sitting all day for school, homework, or gaming can hurt your back. Good office chair lumbar support keeps your spine in a healthy curve and reduces pain. This guide shows you how to set up your chair the right way in 2026, even if you know nothing about chairs.
Quick-Start: 5-Minute Office Chair Lumbar Support Setup Checklist
Follow these five quick steps today. You do not need tools. Most chairs have knobs or levers you can move by hand.
Step 1 – Locate Your Natural Lumbar Curve
Stand against a wall with your heels, back, and head touching it. Slide one hand behind your lower back. The spot where your hand fits is your natural lumbar curve. This is where your office chair lumbar support should press.
Step 2 – Set Seat Height for 90° Knee Angle
Sit on the chair. Your feet must rest flat on the floor. Your knees should bend at a 90-degree angle. If your chair is too high, use a footrest. This is the base of good office chair lumbar support.
Step 3 – Position Lumbar Support at the Right Depth
The back part should touch your lower back but not push too hard. Aim for about two inches of curve depth. If the support pushes you forward too much, it is too deep.
Step 4 – Adjust Recline Tension and Lock
Tilt your chair back a little. The tilt knob is under the seat. A small 100–110 degree tilt helps your spine. Lock the tilt if the chair leans too fast.
Step 5 – Test the Setup with the Mirror Method
Ask a friend or use a phone camera to take a side photo of you sitting. Your ears, shoulders, and hips should line up. Your lower back should press gently into the office chair lumbar support.
Understanding Lumbar Support: Why It Matters for Office Chair Comfort
Your spine has special curves. Without support, these curves flatten when you sit. That is why every good chair has a built-in curve in the back.
The Anatomy of Your Lower Back and the Lumbar Curve
The lower back has five bones called vertebrae. These bones curve inward a bit. This inward curve is the lumbar curve. When you sit, the curve wants to flatten. Office chair lumbar support keeps this curve safe.
How Poor Lumbar Support Leads to Back Pain
If your chair is flat or too soft, your lower back slumps. This puts pressure on discs and muscles. Over time, you get sore, tired, or even have real back pain.
Lumbar Support vs. Pelvic Support: The Latest 2026 Research
New 2026 studies show the hips matter as much as the back. A tilted seat helps your pelvis rotate forward. This helps the lumbar curve stay open. Both types of support work together on a good office chair.
Key Metrics: Seat Angle, Torso-to-Thigh Angle, and Gap Distance
- Seat angle: 0 to 5 degrees forward tilt is best.
- Torso-to-thigh angle: 90 to 100 degrees for work, up to 110 for resting.
- Gap between seat edge and knee: about one to two inches.
How to Find the Correct Lumbar Support Height for Your Body
The office chair lumbar support must match where your lower back curves. This spot is different for tall and short people. Use the two methods below to find your zone.
The Spine-Dip Method: Locating Your Personal Lumbar Zone
Stand up and bend forward slowly. Feel the bumpy line of your spine with your finger. Just above your hips, you will feel a small dip, then a bump. That bump is your lumbar zone. Mark it with tape if you like.
Towel Test: Dialing in the Exact Curve Depth You Need
Roll a small towel into a cylinder about two inches thick. Place it in your chair at your lower back. Sit and rest for five minutes. If it feels nice, measure its thickness. That is your perfect office chair lumbar support depth.
Measurement Guide: 15–25 cm Above Compressed Seat Height
Sit on the chair and press down to compress the cushion. Measure from the seat top to the center of the lumbar pad. For most people, this is 15 to 25 cm (6 to 10 inches).
Tall, Average, and Petite Users: Height-Specific Ranges
| User Height | Lumbar Height Above Seat |
|---|---|
| Under 5’4″ | 15–18 cm (6–7″) |
| 5’4″ to 5’10” | 18–22 cm (7–8.5″) |
| Over 5’10” | 22–25 cm (8.5–10″) |
Step-by-Step Guide to Adjusting Lumbar Support on an Office Chair
Now we move to real adjustments. Each part of the chair works with office chair lumbar support to give you a pain-free day.
Identifying Your Chair’s Adjustment Levers and Knobs
Look under the seat. You will find levers on the left and right side. A round knob controls tilt. Some chairs have a small dial on the back to move the lumbar pad. Read the manual if you are unsure.
Adjusting Lumbar Height (Vertical Slide Mechanisms)
Find the slide bar on the back of the chair. Pull or push it up and down while the chair is empty. The pad should sit at the dip of your lower back. This is the biggest change for office chair lumbar support.
Adjusting Lumbar Depth (Push-In/Pull-Out Systems)
Some pads move in and out. Pull the pad closer to you for more pressure. Push it in for less. The goal is gentle contact, not pain.
Setting Seat Pan Depth for a 0.5–2 Inch Knee Gap
Sit with your back fully in. Slide the seat forward or back so you can fit two fingers between the seat edge and your knee. This keeps blood flowing to your legs.
Fine-Tuning Armrest Height, Width, and Angle
Your arms should rest with shoulders relaxed and elbows at 90 degrees. Move armrests up or down until your shoulders feel loose. They should line up with your desk height too.
Locking in Recline Tension for Posture Support
Lean back until you feel the chair resist. The knob under the seat controls this. Set it so the chair moves only when you choose. Lock it in place during deep work.
Office Chair Lumbar Support Guide for Different Body Types
Your height changes how you set up office chair lumbar support. Here is what to do for each group.
Setup Adjustments for Users Under 5’4″
Short users often sit in chairs made for taller people. Lower the seat, use a footrest, and move the lumbar pad to its lowest spot. A small lumbar pillow can help fill a big gap.
Setup Adjustments for Users 5’4″ to 5’10”
This is the average range. Most chairs will fit well. Set the seat flat, lumbar pad at mid-height, and check your armrests match the desk. This group enjoys the widest office chair lumbar support range.
Setup Adjustments for Users Over 5’10”
Tall users need more lumbar height and seat depth. Extend the seat forward. Move the lumbar pad to its highest spot. A headrest helps your neck too.
How Seat Depth and Lumbar Range Vary by Chair Size
Small chairs have 16-inch seats and short lumbar travel. Large chairs have 19-inch seats and more slide range. Pick the size that matches your body first, then fine-tune the office chair lumbar support.
Troubleshooting Common Office Chair Lumbar Support Problems
Problems are common when you first set up your chair. Use this quick guide to find the fix.
Problem: Lower Back Aching After 1–2 Hours → Lumbar Too Low or Too Shallow
If your back hurts after a short time, the pad is probably in the wrong spot. Move it up half an inch and add depth. Your lower back should feel held, not floating.
Problem: Slouching Forward Despite Lumbar Support → Seat Angle Issue
You may slide forward because the seat tilts down. Tilt the seat slightly forward so your hips are higher than your knees. This keeps your spine stacked over your pelvis.
Problem: Lumbar Support Feels Intrusive or Painful → Depth or Positioning Error
Pain means it is too hard or off-center. Pull the pad out less. Move it a little left or right until you feel bones, not squishy spots.
Problem: Shoulders and Neck Stiffness → Recline or Monitor Height Mismatch
If your neck aches, open the recline to 100 degrees. Raise your monitor so the top edge is at eye level. The office chair lumbar support works best when your neck is relaxed too.
Problem: Numbness in Legs → Seat Pan Depth or Height Correction
Numb legs mean the seat presses on the back of your thighs. Shorten the seat depth or raise the chair. Check that feet are flat on the floor.
How to Verify Your Office Chair Lumbar Support Is Working Correctly
Setup is not a one-time job. Check often to be sure the office chair lumbar support is still helping your back.
The Side-Angle Phone Camera Test
Put your phone on a table and record yourself sitting from the side. Watch the video. Your lower back should press into the chair, and your head should not lean forward.
The 30-Minute Comfort Check Protocol
Work or study for half an hour. Then ask yourself: Is my lower back held? Are my shoulders relaxed? Can I breathe easy? If no, reset the office chair lumbar support.
The 30–60 Movement Rule: Why No Chair Replaces Stretching
Even the best office chair lumbar support cannot fix static sitting. Stand up and stretch every 30 to 60 minutes. Walk to get water or do a quick back stretch.
Weekly Reassessment: How Your Setup Needs Change Over Time
Your body changes. You grow, gain, or lose weight. Check your chair weekly. Readjust the office chair lumbar support after any big change in how you feel.
Integrating Lumbar Support with Your Full Desk Setup
Office chair lumbar support works with the rest of your desk. Set each piece in order for the best results.
Matching Chair Height to Desk Surface Height
The chair should let your elbows rest at the desk with shoulders relaxed. If your desk is fixed height, adjust the chair and use a keyboard tray if needed.
Monitor Positioning: Top Edge at Eye Level
The top of your screen should match your eyes. Sit back in your office chair lumbar support, then look straight ahead. You should look at the top third of the screen.
Keyboard and Mouse Placement for Neutral Wrist Position
Keep the keyboard right in front of you. Your wrists should be straight, not bent up or down. The mouse should sit close so you do not reach far.
Footrest Use When Chair Height Exceeds Optimal Range
If your chair must be high to match the desk, add a footrest. Your feet should not hang. A small slanted footrest keeps your legs and office chair lumbar support in balance.
FAQ: Common Questions About Office Chair Lumbar Support
Here are quick answers to the questions people ask most.
How High Should Lumbar Support Be on an Office Chair?
It should sit at the small of your back, about 15 to 25 cm (6 to 10 inches) above the seat. Short users need 6 inches, tall users need 10 inches.
Can Lumbar Support Make Back Pain Worse?
Yes, if it is in the wrong spot or too deep. Good office chair lumbar support feels like a hand holding you, not a rock poking your spine. Move it until the pain stops.
Do I Need a Lumbar Pillow if My Chair Already Has Support?
Only add a pillow if the built-in office chair lumbar support is not enough. Try a small towel roll first. If you like it, buy a firm pillow.
How Often Should I Adjust My Lumbar Support?
Check it after any big change, like new shoes, a new desk, or more workout. Otherwise, a quick check once a week is enough.
Is a Mesh Back Good Enough for Lumbar Support?
Mesh backs flex with your body and feel cool. You still want a clear curve inside. Mesh is fine if it keeps the lumbar shape when you lean on it.
Conclusion: Your 2026 Office Chair Lumbar Support Action Plan
Now you have a plan to set up your office chair lumbar support step by step. Start small. Follow the five-minute checklist today. Then use the rest of this guide when you want to fine-tune.
Three quick rules to remember:
- Keep your natural lumbar curve filled but not pushed hard.
- Match the chair to your body height, not the other way around.
- Move every 30 to 60 minutes. No chair replaces being active.
Good office chair lumbar support makes homework, gaming, and long desk days much easier. Spend ten minutes setting it up now, and your back will thank you every day of 2026.