

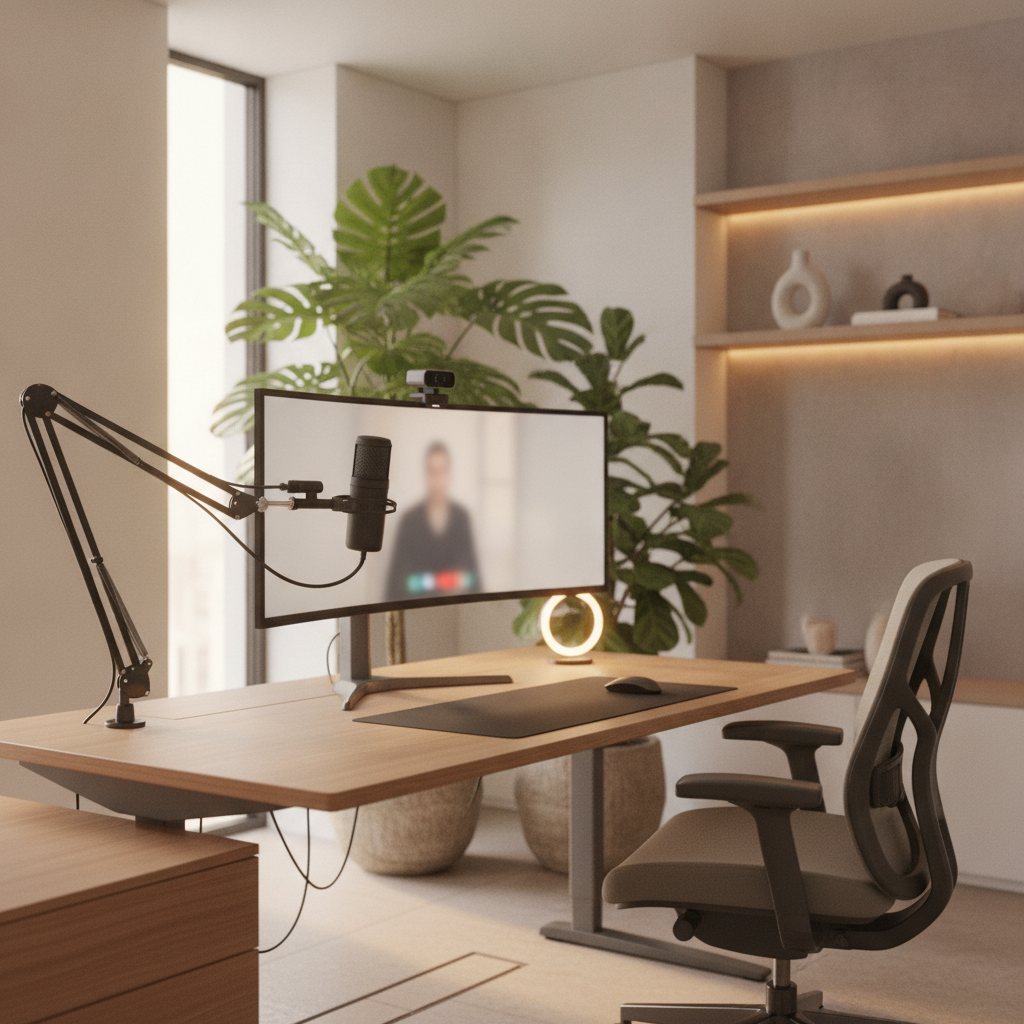
Video calls are now a normal part of school, work, and daily life. A good home office setup for video calls helps you look professional and sound clear. You do not need expensive gear to get started. With a few simple changes, you can improve your camera, lighting, background, and audio. This guide walks you through every step. By the end, you will have a clean, professional setup ready for any video call.
Quick Setup Checklist – 4 Things to Get Right First
Before you buy anything, focus on these four areas. They make the biggest difference in how you look and sound on video calls.
Priority Order: Camera, Lighting, Background, Audio
Start with your camera position. Then fix your lighting. Next, clean up your background. Finally, improve your audio. This order gives you the best results fast. Good lighting matters more than an expensive webcam. A clean background looks better than any virtual filter.
Essential Equipment List for Home Office Video Calls
- A webcam or laptop camera (1080p preferred)
- A desk lamp or ring light for front lighting
- A USB microphone or headset with a mic
- A stable desk or table at the right height
- An Ethernet cable or strong Wi-Fi connection
- A plain wall or simple backdrop behind you
Time Required: 30-Minute Setup Guide
You can finish a basic home office setup for video calls in about 30 minutes. Spend 10 minutes on camera and lighting. Use 10 minutes for your background. The last 10 minutes go to audio and internet testing. If you want a full upgrade with new equipment, plan for one to two hours.
Step 1: Position Your Webcam for Professional Video Calls
Your camera angle changes how people see you. A bad angle makes you look tired or unprofessional. Follow these steps to get it right.
Ideal Camera Height: Eye Level Placement Guide
Place your webcam at eye level. When the camera looks down at you, it creates an unflattering angle. When it looks up, people see your nose and ceiling. Stack books under your laptop or use a monitor stand. Your eyes should line up with the top third of the screen. This simple change makes a big difference.
Camera Distance: 18-24 Inches for Natural Framing
Sit about 18 to 24 inches from your camera. This distance shows your head and shoulders. It feels natural and professional. If you sit too close, the camera distorts your face. If you sit too far, you look small and distant. Place your forearm on the desk. Your fist should just touch the screen. That is a good starting distance.
Webcam Resolution: Why 1080p Is the 2026 Standard
In 2026, 1080p is the standard resolution for home office video calls. It gives a clear, sharp image without using too much bandwidth. A 720p camera works, but 1080p looks much better. Avoid 4K webcams for now. They cost more and most platforms compress the video anyway. A good 1080p webcam costs between $50 and $100.
Best Webcam Mounts and Stands for Home Office
A good mount keeps your camera steady at the right height. Here are your best options:
- Clip-on mount: Attaches to the top of your monitor. Most webcams include one.
- Desk stand: A small tripod that sits on your desk. Great for adjustable height.
- Monitor arm mount: Clamps to a desk arm for a floating camera setup.
- Laptop stand: Raises your whole laptop to eye level. Simple and cheap.
Step 2: Set Up Lighting for Video Calls at Home
Lighting is the number one thing that improves your video call quality. Good light makes you look clear and professional. Bad light makes you look dark or washed out.
Front Lighting vs. Backlight: Avoid Looking Washed Out
Never sit with a window behind you. Backlight makes you look like a dark shadow. The light should come from in front of you or slightly to the side. Face your window or place a lamp behind your monitor. This lights up your face evenly. If you must sit near a window, use curtains to soften the light.
Best Lighting Positions: Window Placement and Ring Lights
The best natural light comes from a window directly in front of you. Sit facing the window with your camera between you and the glass. If natural light is not enough, use a ring light. Place it behind your monitor at face height. A ring light gives even, soft light that removes shadows. Position it about 12 to 18 inches from your face.
Lighting Intensity: Soft, Diffused Light for Professional Appearance
Harsh light creates strong shadows on your face. Soft, diffused light looks much better. You can soften light by bouncing it off a white wall or using a diffuser. Many ring lights and desk lamps have a diffuser cover. Set the brightness to medium. You want to see clearly without squinting. If your face looks too bright, lower the light by 20 percent.
One-Touch Lighting Solutions for Quick Setup
If you want a fast setup, try these simple solutions:
- A USB-powered LED desk lamp with adjustable brightness
- A clip-on ring light that attaches to your monitor
- A light bar that sits on top of your monitor
- Smart bulbs that let you set the color temperature with your phone
Step 3: Create a Professional Background for Video Calls
People see your background on every call. A messy room sends the wrong message. A clean, simple background looks professional and keeps the focus on you.
Clean and Clutter-Free: What to Remove from Camera Frame
Before your next call, check what your camera sees. Remove these items from the frame:
- Dirty dishes or food containers
- Stacks of papers or laundry
- Personal photos or sensitive documents
- Messy cables and chargers
- Anything that moves, like a fan or pet toys
Background Setup Ideas: Bookshelves, Plants, and Neutral Walls
A simple background works best. Here are some ideas that look great on camera:
- A plain wall painted in white, gray, or soft blue
- A small bookshelf with a few books and a plant
- A piece of art or a framed photo hung at eye level
- A fabric backdrop or curtain in a neutral color
Virtual Backgrounds vs. Real Backgrounds: Which Works Better in 2026
In 2026, virtual backgrounds are better than ever. Most platforms like Zoom, Teams, and Google Meet offer blur and custom background options. A blurred background is a safe choice. It hides clutter without looking fake. A custom virtual background works well if your real background is very messy. However, a real clean background always looks more natural and professional.
Cable Management: Hide Wires for a Polished Look
Visible cables make your setup look messy. Use these cheap solutions to hide them:
- Adhesive cable clips to route wires along your desk edge
- A cable management box to hide power strips
- Velcro cable ties to bundle cords together
- Under-desk cable trays to hold everything out of sight
Step 4: Optimize Audio Quality for Home Office Video Conferencing
Bad audio ruins a video call faster than bad video. People will tolerate a blurry image, but they will leave if they cannot hear you clearly.
Why Laptop Mics Fail: Echo and Background Noise Problems
Laptop microphones pick up everything. They capture your voice, keyboard clicks, fan noise, and room echo. The sound often feels distant and tinny. In a room with hard walls, your voice bounces back as echo. This makes it hard for others to understand you. An external microphone solves all of these problems.
Best Microphone Options: USB Mics, Headsets, and Boom Arms
Choose a microphone based on your needs and budget:
- USB desktop mic: Great sound quality. Sits on your desk. Best for quiet rooms.
- Headset with mic: Blocks background noise. Good for noisy homes.
- Boom arm mic: Mounts to your desk. Positions the mic close to your mouth. Looks professional.
- Wireless earbuds: Convenient and portable. Good enough for casual calls.
Microphone Placement: 6-12 Inches from Your Mouth
Place your microphone 6 to 12 inches from your mouth. Too close, and your voice sounds boomy. Too far, and you sound quiet and echoey. If using a headset, position the mic boom just below the corner of your mouth. Speak directly into the mic for the clearest sound.
Room Acoustics: Reduce Echo with Soft Furnishings and Sound Panels
Hard surfaces like bare walls, glass, and tile create echo. Add soft items to absorb sound:
- A thick rug or carpet on the floor
- Curtains or blinds on windows
- A bookshelf filled with books breaks up sound waves
- Foam sound panels on the wall behind your monitor
- A padded chair or couch in the room
Step 5: Ensure Stable Internet for Smooth Video Calls
A fast internet connection keeps your video calls smooth. A slow or unstable connection causes freezing, lag, and dropped calls.
Required Internet Speed: 5 Mbps for HD, 15 Mbps for Multi-Participant
For a single HD video call, you need at least 5 Mbps upload speed. For group calls with many participants, aim for 15 Mbps or more. Download speed matters less than upload speed for video calls. Test your speed at speedtest.net before important meetings.
Wi-Fi vs. Ethernet: When to Switch for Reliable Connection
Wi-Fi is convenient but can be unstable. An Ethernet cable gives a faster, more reliable connection. If your video calls freeze often, switch to Ethernet. Plug one end into your router and the other into your computer. This simple change fixes most connection problems.
Router Placement and Band Selection (2.4 GHz vs. 5 GHz)
Place your router in a central, open location. Keep it away from walls, microwaves, and metal objects. For video calls, use the 5 GHz band. It is faster and has less interference. The 2.4 GHz band reaches farther but is slower and more crowded. Most modern routers let you choose between the two.
Bandwidth Management: Close Background Apps Before Calls
Other apps on your computer and network use bandwidth. Before a call, close these apps:
- Video streaming services like YouTube or Netflix
- File downloads or cloud sync tools
- Online games running in the background
- Other browser tabs with auto-playing videos
Ask others in your home to avoid heavy internet use during your important calls.
Best Equipment for Home Office Video Calls by Budget (2026)
You do not need to spend a lot to look and sound professional. Here are three setup levels to match your budget.
Budget Setup Under $200: Essential Gear for Beginners
This setup covers the basics without breaking the bank.
| Item | Example | Price |
|---|---|---|
| Webcam | Logitech C920 or similar 1080p webcam | $60-$80 |
| Lighting | Clip-on ring light or LED desk lamp | $25-$40 |
| Microphone | USB condenser mic or wired headset | $30-$50 |
| Stand | Laptop stand or small tripod | $20-$30 |
Mid-Range Setup $200-$500: Professional Quality for Remote Workers
This setup gives you a clear step up in quality. It is ideal for people who take video calls every day.
| Item | Example | Price |
|---|---|---|
| Webcam | Logitech Brio or Razer Kiyo Pro | $100-$170 |
| Lighting | 10-inch ring light with tripod or LED panel | $40-$80 |
| Microphone | Blue Yeti or Elgato Wave USB mic | $80-$150 |
| Boom Arm | Desktop mic boom arm with shock mount | $30-$60 |
Premium Setup $500+: Studio-Grade Video Call Experience
This setup is for professionals who want the best possible image and sound. It includes high-end gear that rivals a small studio.
| Item | Example | Price |
|---|---|---|
| Camera | DJI Osmo Pocket or mirrorless camera with capture card | $200-$400 |
| Lighting | Two LED panel lights with softboxes | $100-$200 |
| Microphone | Shure MV7 or Rode PodMic with audio interface | $150-$300 |
| Acoustic Treatment | Foam panels and a desktop reflection filter | $50-$100 |
Test Your Home Office Video Call Setup Before Important Meetings
Never test your setup for the first time during an important call. Always check everything before the real meeting.
Pre-Call Checklist: Camera, Audio, Lighting, and Internet Test
Run through this quick checklist 10 minutes before your call:
- Open your video call app and check your camera preview.
- Make sure your face is well-lit and in focus.
- Speak out loud and check that the audio meter moves.
- Run a quick speed test to confirm your internet is stable.
- Close all unnecessary apps and browser tabs.
- Check that your background looks clean and professional.
Record a Test Video: Check Framing and Sound Quality
Most video apps let you record a test clip. Record 30 seconds of yourself talking. Watch it back. Check these things:
- Is your face centered and well-lit?
- Can you hear your voice clearly without echo?
- Is there any background noise you did not notice?
- Does the video look smooth or does it lag?
Platform-Specific Settings: Zoom, Teams, and Google Meet Optimization
Each platform has settings that improve your video call quality:
- Zoom: Enable “HD video” and “Touch up my appearance.” Use “Background noise suppression” set to High.
- Microsoft Teams: Turn on “Noise suppression.” Enable “Blur background” or choose a custom image.
- Google Meet: Select “Send and receive in HD.” Use “Noise cancellation” and “Auto-framing” if available.
Troubleshooting Common Home Office Video Call Problems
Even the best setup can have issues. Here is how to fix the most common problems.
Fix Poor Video Quality: Adjust Lighting and Camera Settings
If your video looks dark or grainy, the problem is usually lighting. Add more light in front of you. Make sure the light is not too harsh. In your camera app, check the resolution settings. Set it to 1080p if available. Clean your webcam lens with a soft cloth. A dirty lens makes the image look blurry.
Solve Audio Issues: Echo, Background Noise, and Mic Problems
If people hear an echo, you may have both speakers and mic active. Use headphones to fix this. If there is background noise, move your mic closer to your mouth. Turn on noise suppression in your video app. If your mic sounds muffled, check that it is not blocked by a pop filter or your hand.
Handle Internet Dropouts: Quick Fixes for Unstable Connection
If your call keeps freezing or dropping, try these steps:
- Move closer to your router or switch to an Ethernet cable.
- Restart your router by unplugging it for 30 seconds.
- Switch to the 5 GHz Wi-Fi band.
- Lower your video quality to 720p to use less bandwidth.
- Ask others in your home to stop streaming during your call.
Improve Camera Framing: Adjust Distance and Angle
If you look too big or too small on camera, adjust your distance. Move your chair back if you are too close. Move forward if you are too far. Tilt your screen up or down until the camera points straight at your face. A small change in angle makes a big difference in how you look.
FAQ: Home Office Setup for Video Calls
What Is the Best Webcam for Home Office Video Calls in 2026?
The Logitech C920 remains a top pick for its price and quality. For a step up, the Logitech Brio or Razer Kiyo Pro offers better low-light performance. If you want the best image, a mirrorless camera with a capture card gives studio-level quality.
Do I Need a Ring Light for Video Calls?
You do not need one if you have good natural light from a window in front of you. But if your room is dark or you take calls at night, a ring light makes a big difference. A simple clip-on ring light costs under $30 and improves your image right away.
How Do I Look Professional on Video Calls from Home?
Follow these tips: wear clean, solid-color clothing. Sit up straight. Make eye contact with the camera, not the screen. Keep your background clean. Use good lighting on your face. Speak clearly and at a steady pace. These small steps make you look confident and professional.
What Internet Speed Do I Need for Video Conferencing?
You need at least 5 Mbps upload speed for a smooth HD video call. For group calls with screen sharing, aim for 15 Mbps or more. Test your speed before important meetings. If your speed is low, switch to Ethernet or reduce video quality.
Can I Use My Laptop for Professional Video Calls?
Yes, most modern laptops work well for video calls. The built-in camera and mic are okay for basic use. For better quality, add an external webcam and USB microphone. Raise your laptop to eye level with a stand. These small upgrades make your laptop setup look and sound much more professional.
Conclusion: Build Your Professional Home Office Video Call Setup
A great home office setup for video calls does not require a huge budget. Start with the basics: position your camera at eye level, add front lighting, clean your background, and use an external microphone. Test your setup before every important call. Fix problems early with the troubleshooting tips in this guide. As your needs grow, upgrade one piece of equipment at a time. With these steps, you will look sharp, sound clear, and feel confident on every video call in 2026 and beyond.